Powder Brows technique (soft shading)
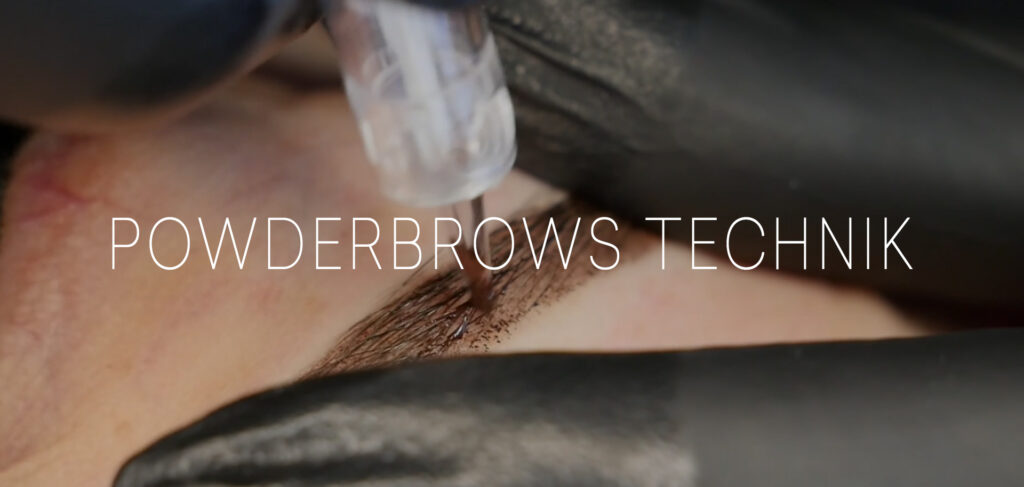
Hard Facts:
- Needle: 1 liner (Revo 1P) 0.3 - 0.4
- Needle length: 1.5 - 3 mm (approx. average length of the needle)
- Angle: 60 - 90 degrees
- Pressure: very gentle and superficial
- Movements: uniform rocking movements in different directions
- Speed:
Simplicity Artist machine: 3 - 5
Simplicity Master machine: 5
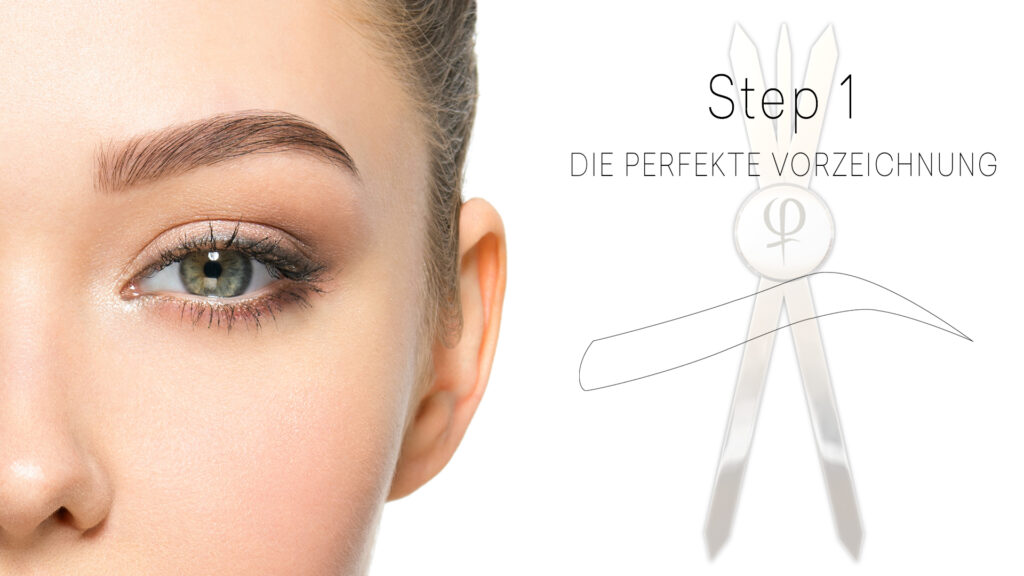
Step 1: The preliminary drawing
Draw the perfect shape according to the golden ratio.
A precise preliminary drawing is the basis for the perfect brow.
Make sure that you draw precise and fine lines and then use the Phi app to check the symmetry of your preliminary drawing before you start pigmenting.
Step 2
Divide the brow into areas before you start pigmenting. (You can do this visually or mark the areas outside the preliminary drawing with the marker pen in order to work precisely and efficiently)

Step 3: Opening the brow / Shading Step 1
Pigmentation begins with the outer third of the eyebrow.
After the first small part of the eyebrow tip has been opened, they use a wipe test to check whether the movement, pressure and color application are optimal.
Caution! When opening the skin, only a very light color result is visible, as the shading is built up in several steps.
However, a slight shading should be recognizable so that you are no longer dependent on the preliminary drawing.
If no result is visible due to the condition of the skin, repeat the gentle movements several times on one area, but without increasing the pressure.
Work towards the center of the eyebrows with gentle oscillating movements.
The pressure exerted is very gentle and superficial.
The surface of the skin is only scratched, so to speak.
The powder effect is best achieved when the movements are carried out smoothly and evenly.
Always use a wipe test to make sure that you are achieving the optimum paint application with your working method.
The powder technique is pigmented very superficially and should achieve a very natural result.
Please note that the color will intensify and build up as the pigmentation progresses.
This means that the color saturation is initially rather weak and builds up slowly!
The brow is often over-pigmented and too much color is applied.

MASTER TIP!
Apart from the smudge test in the first rear third of the brow, you should not remove the color during the pigmentation process.
This serves as a so-called "color mask" which, in contrast to the microblading technique, is not applied at the end but at the beginning of the technique.
If you are unsure during the first shading step whether the skin is absorbing color, repeat the wipe test several times to be sure.
IMPORTANT:
Alternate between the brows after each step to allow the pigments to stabilize.
You will notice how the color builds up and thus counteract oversaturation with color pigments.
Pigment the individual areas (whether visually divided or marked) bit by bit towards the base of the eyebrows.
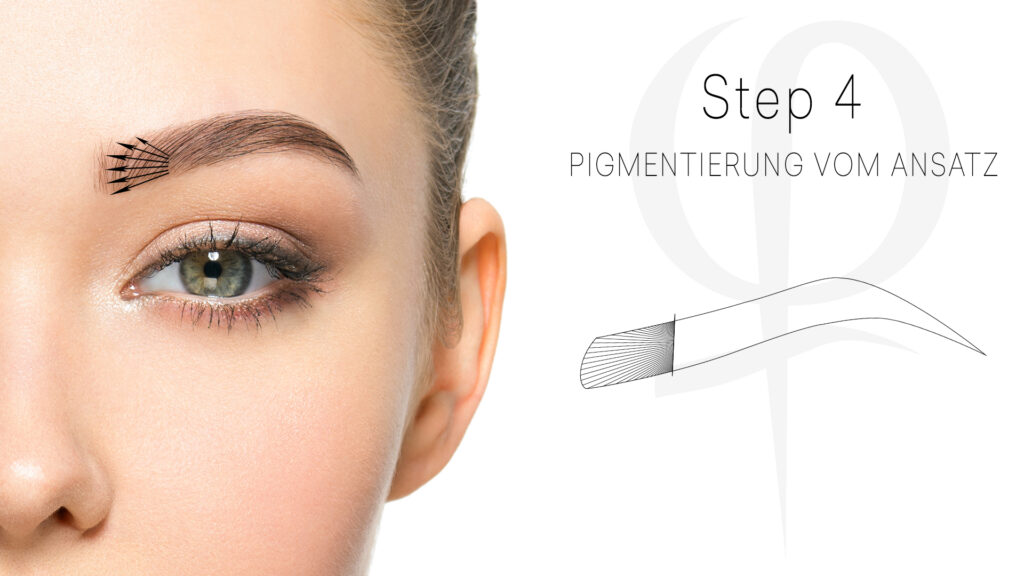
Step 4: Pigmenting the base
You should pay particular attention to the pressure and the swinging movement at the base of the brow as this should have a gradient.
Spring the movement outwards to create this gradient.
Figuratively speaking, the roots are pigmented in half a sun.
Especially towards the upper part of the eyebrow, the line should also lead slightly upwards to avoid pigmentation of a visible line.
Step 5: Intensify shading
Now the shading is consolidated or intensified.
The shading steps are now repeated until the desired color result has been achieved.
Concentrate on the lower part of the brow for the time being.
Depending on the skin type, the shading steps may need to be repeated one or more times.
However, make sure to switch to the other brow after each shading pass (of the whole brow) to check the build-up of the color.
The base and the upper third of the brow should only be refined in the final pass.
Clean the brow thoroughly between passes.
It is recommended to clean the brows against the direction of growth of the hairs in order to be able to control the color application perfectly. Color residue can be deposited between the hairs and thus distort the color result.

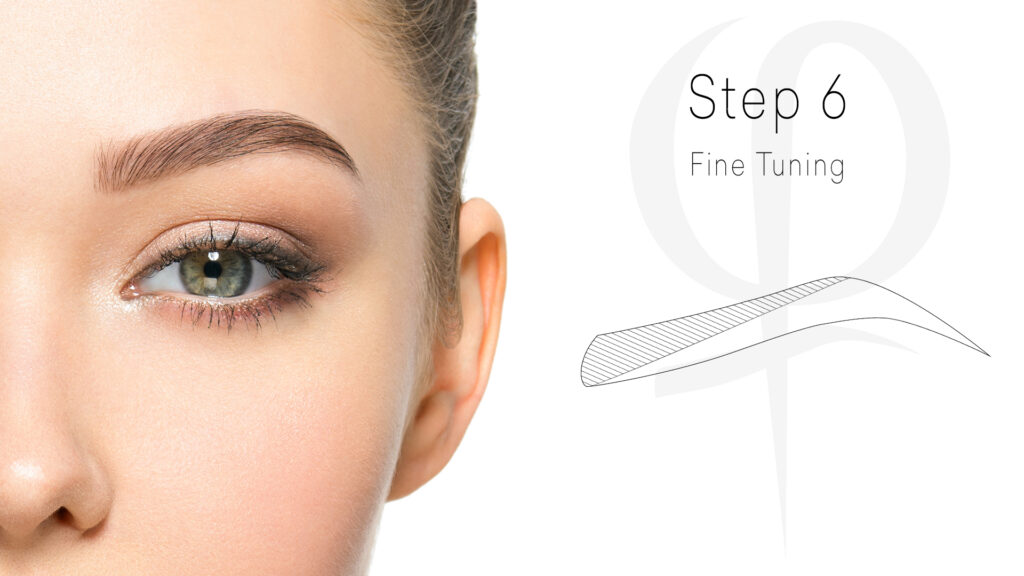
Step 6:
The brow is only refined in the final shading step.
The base and the upper third of the brow must be pigmented with gentle, sweeping movements to achieve a fine gradient and pixel effect.