
Handpiece guidance
Handpiece guidance
Perfect results through proper handpiece guidance and speed
Slow handpiece movement
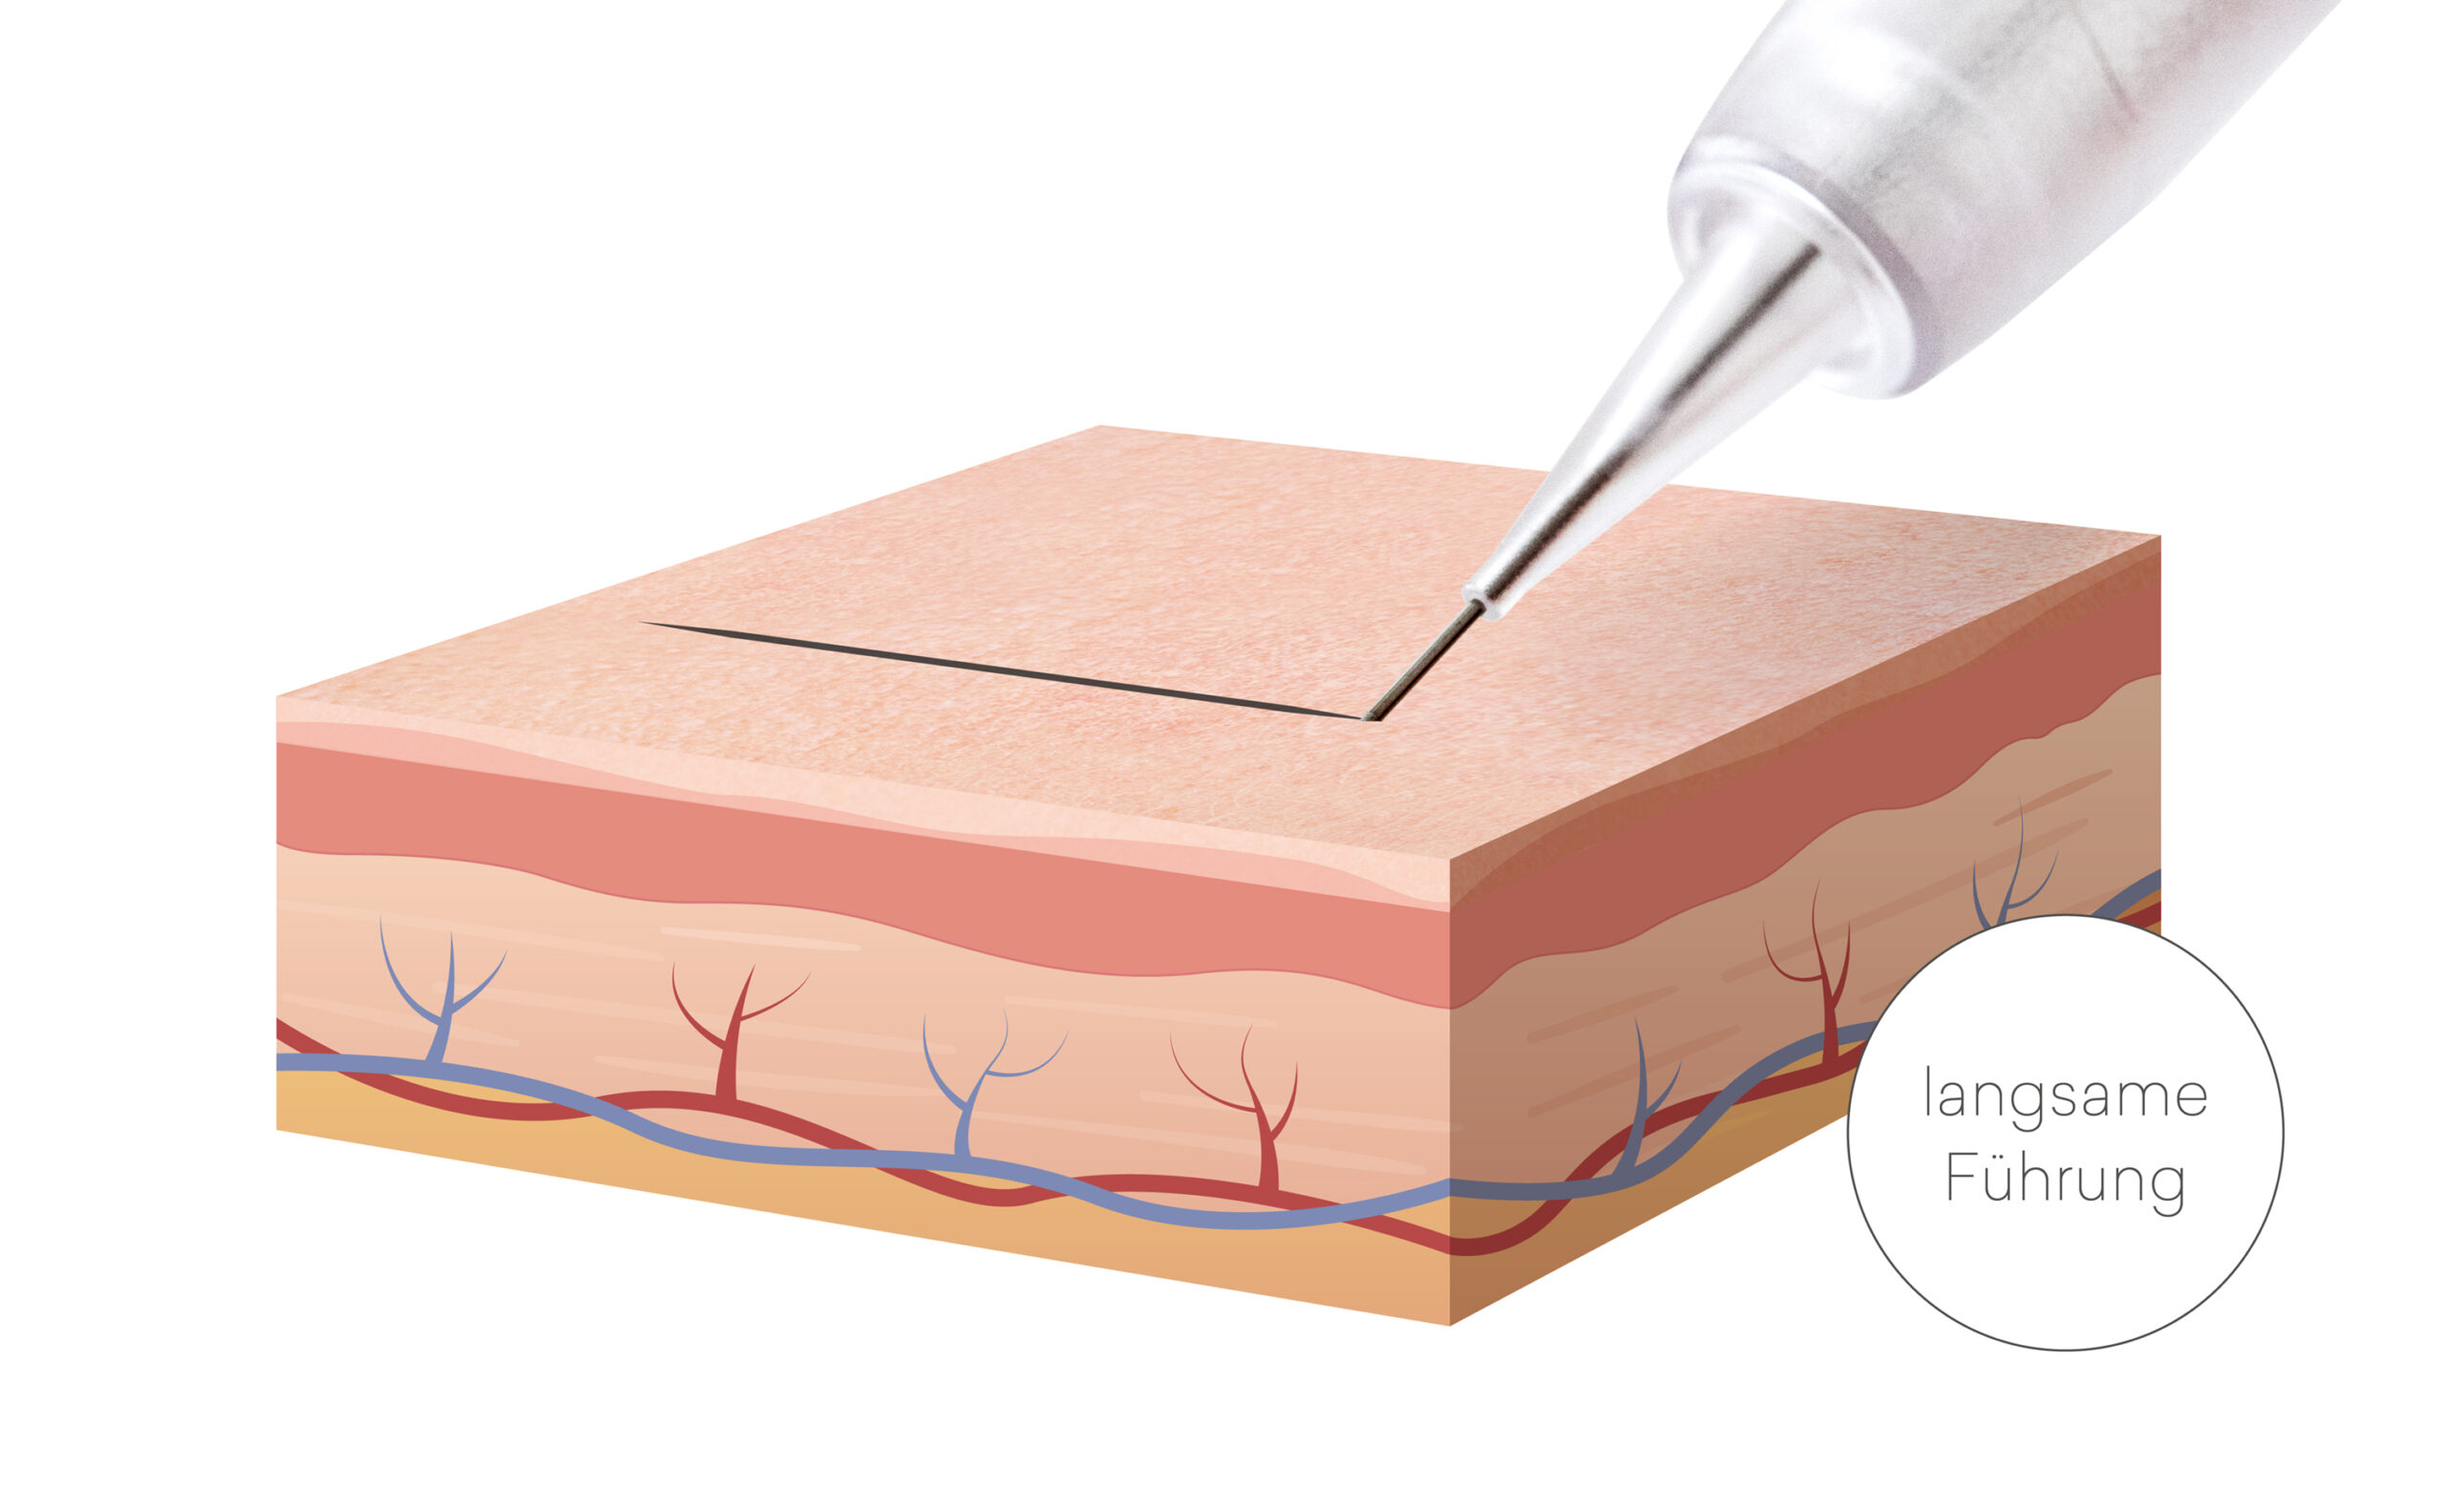
Slow movements produce a bold and rich color result, as the many perforation channels per centimeter apply the color closely and precisely.
A slow, controlled motion is used, for example, when outlining the lips and when making small, precise corrections.
Rapid handpiece movement
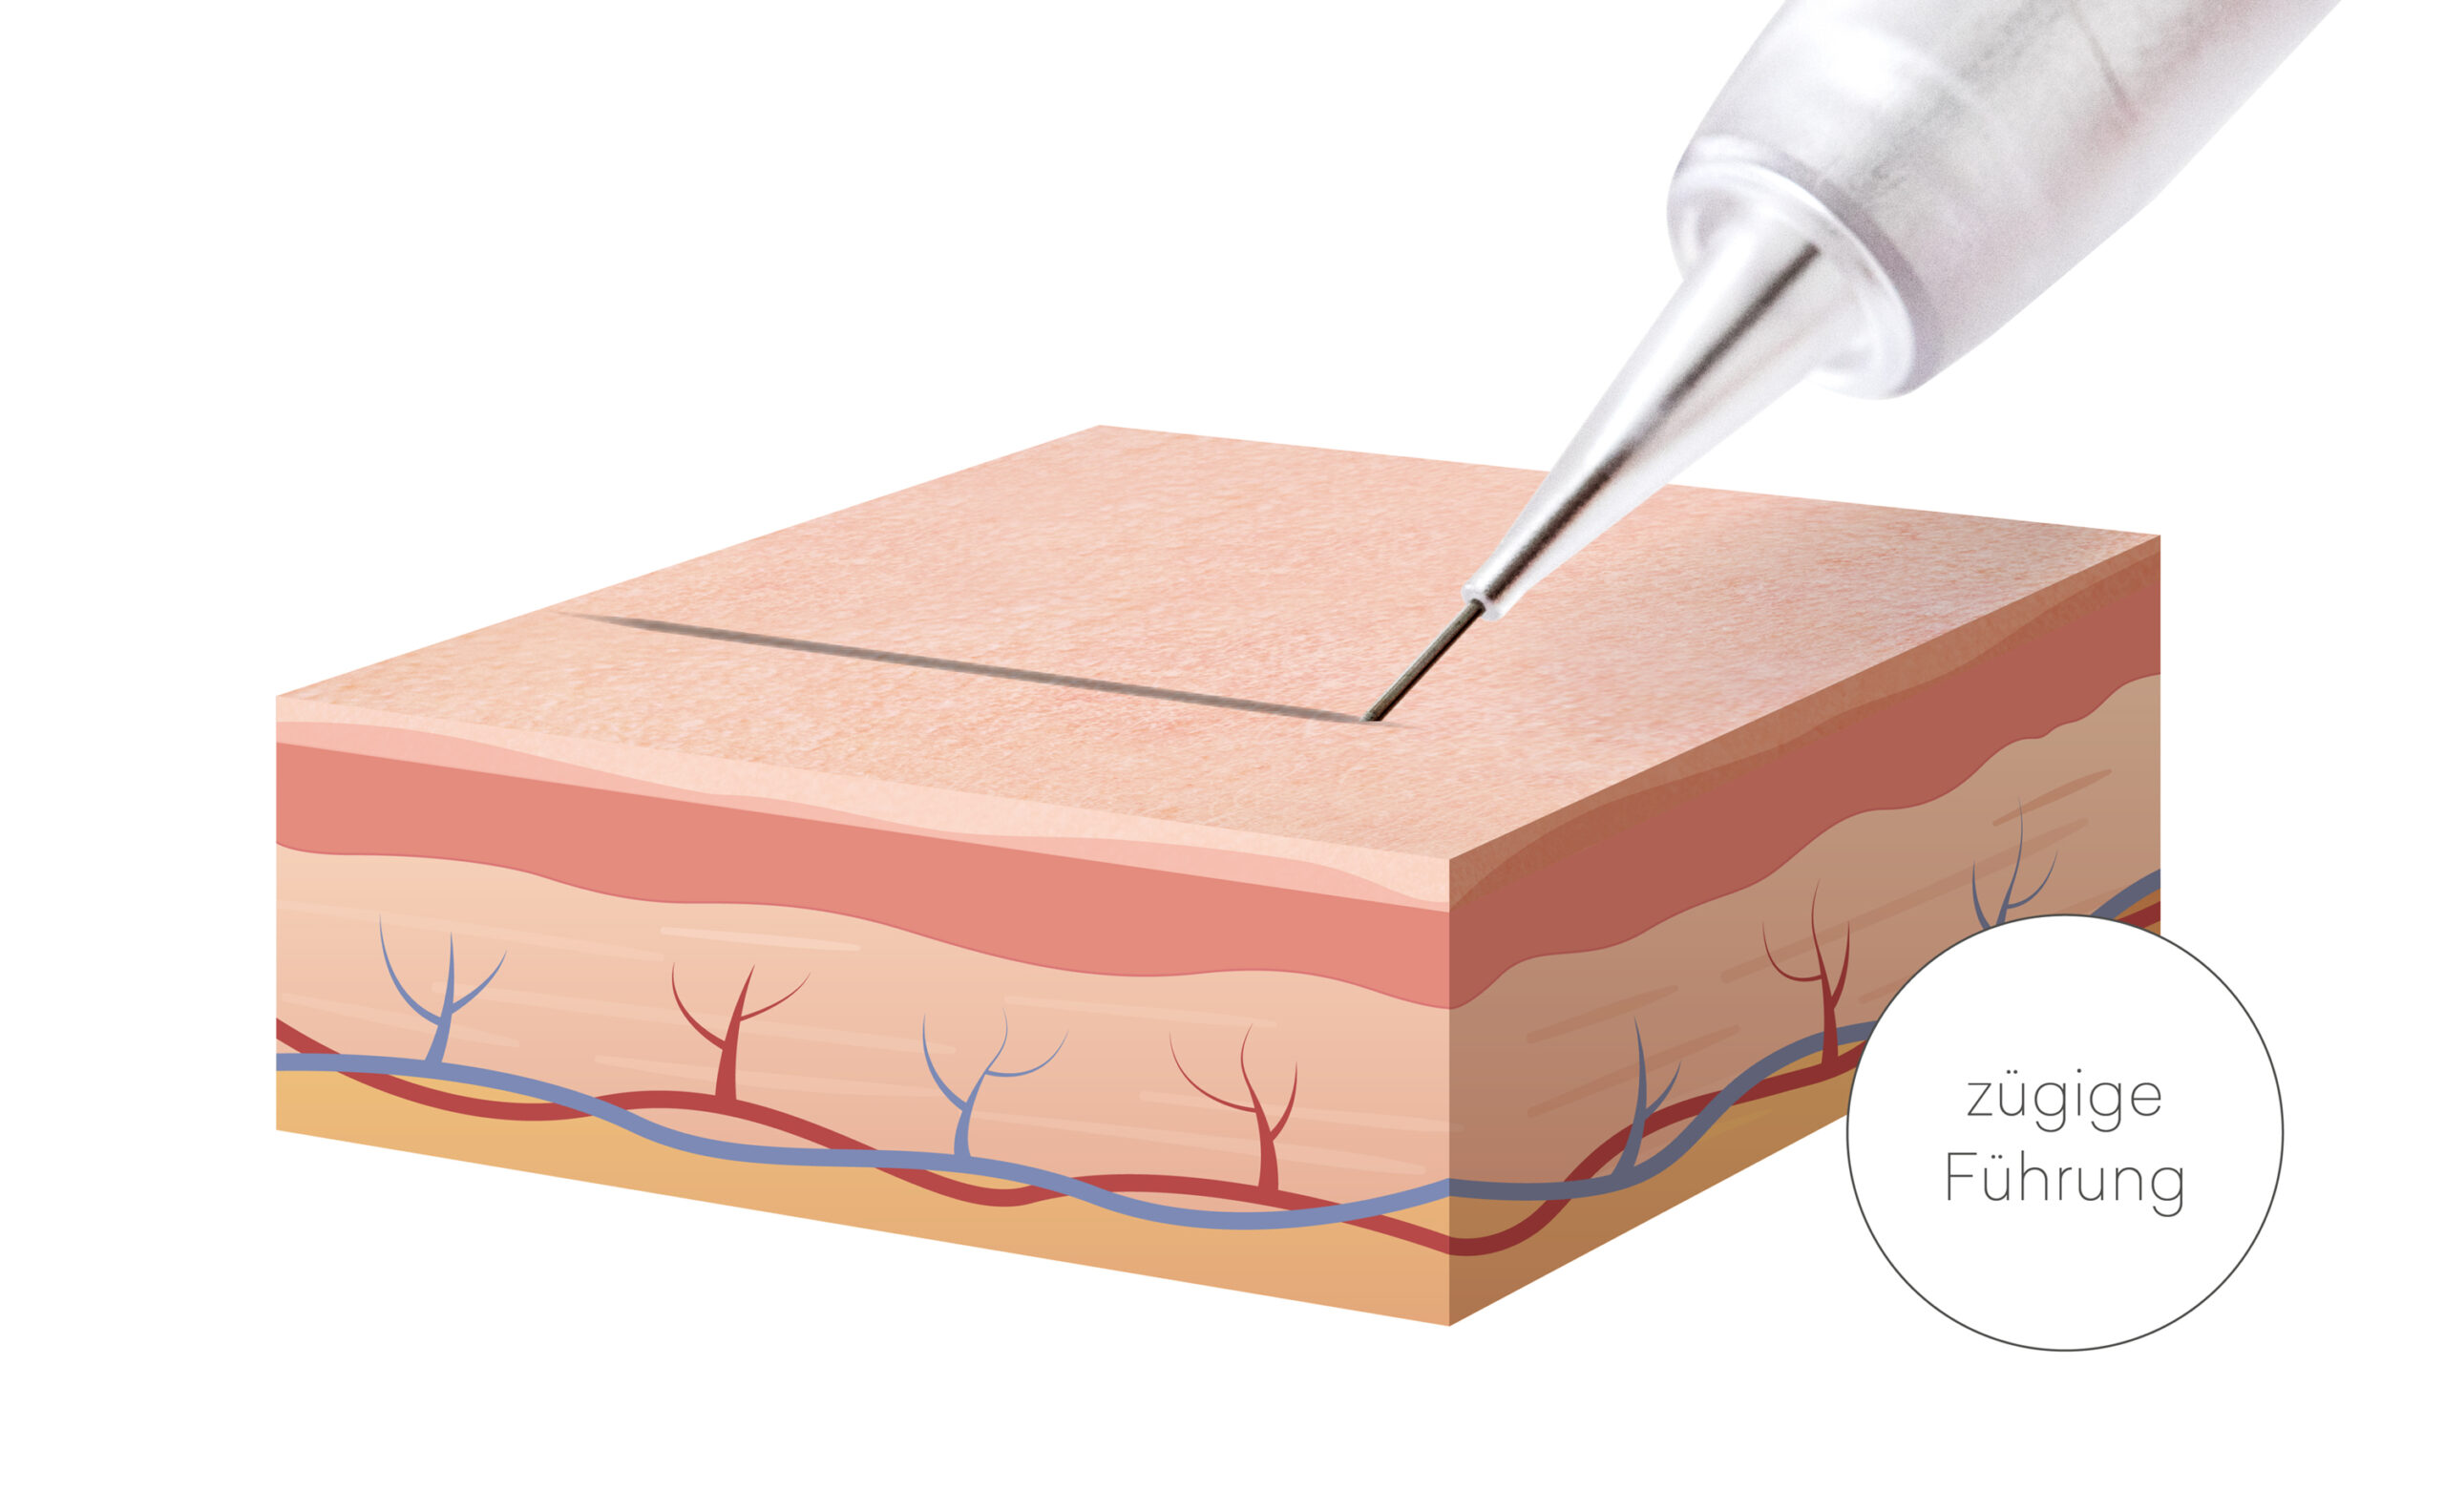
When the needle is moved quickly, the perforation channels are spread out over a wider area. This results in fewer punctures per centimeter, so less ink is deposited into the skin. Faster movements are used, for example, when creating shading and color gradients.
Fast handpiece movement
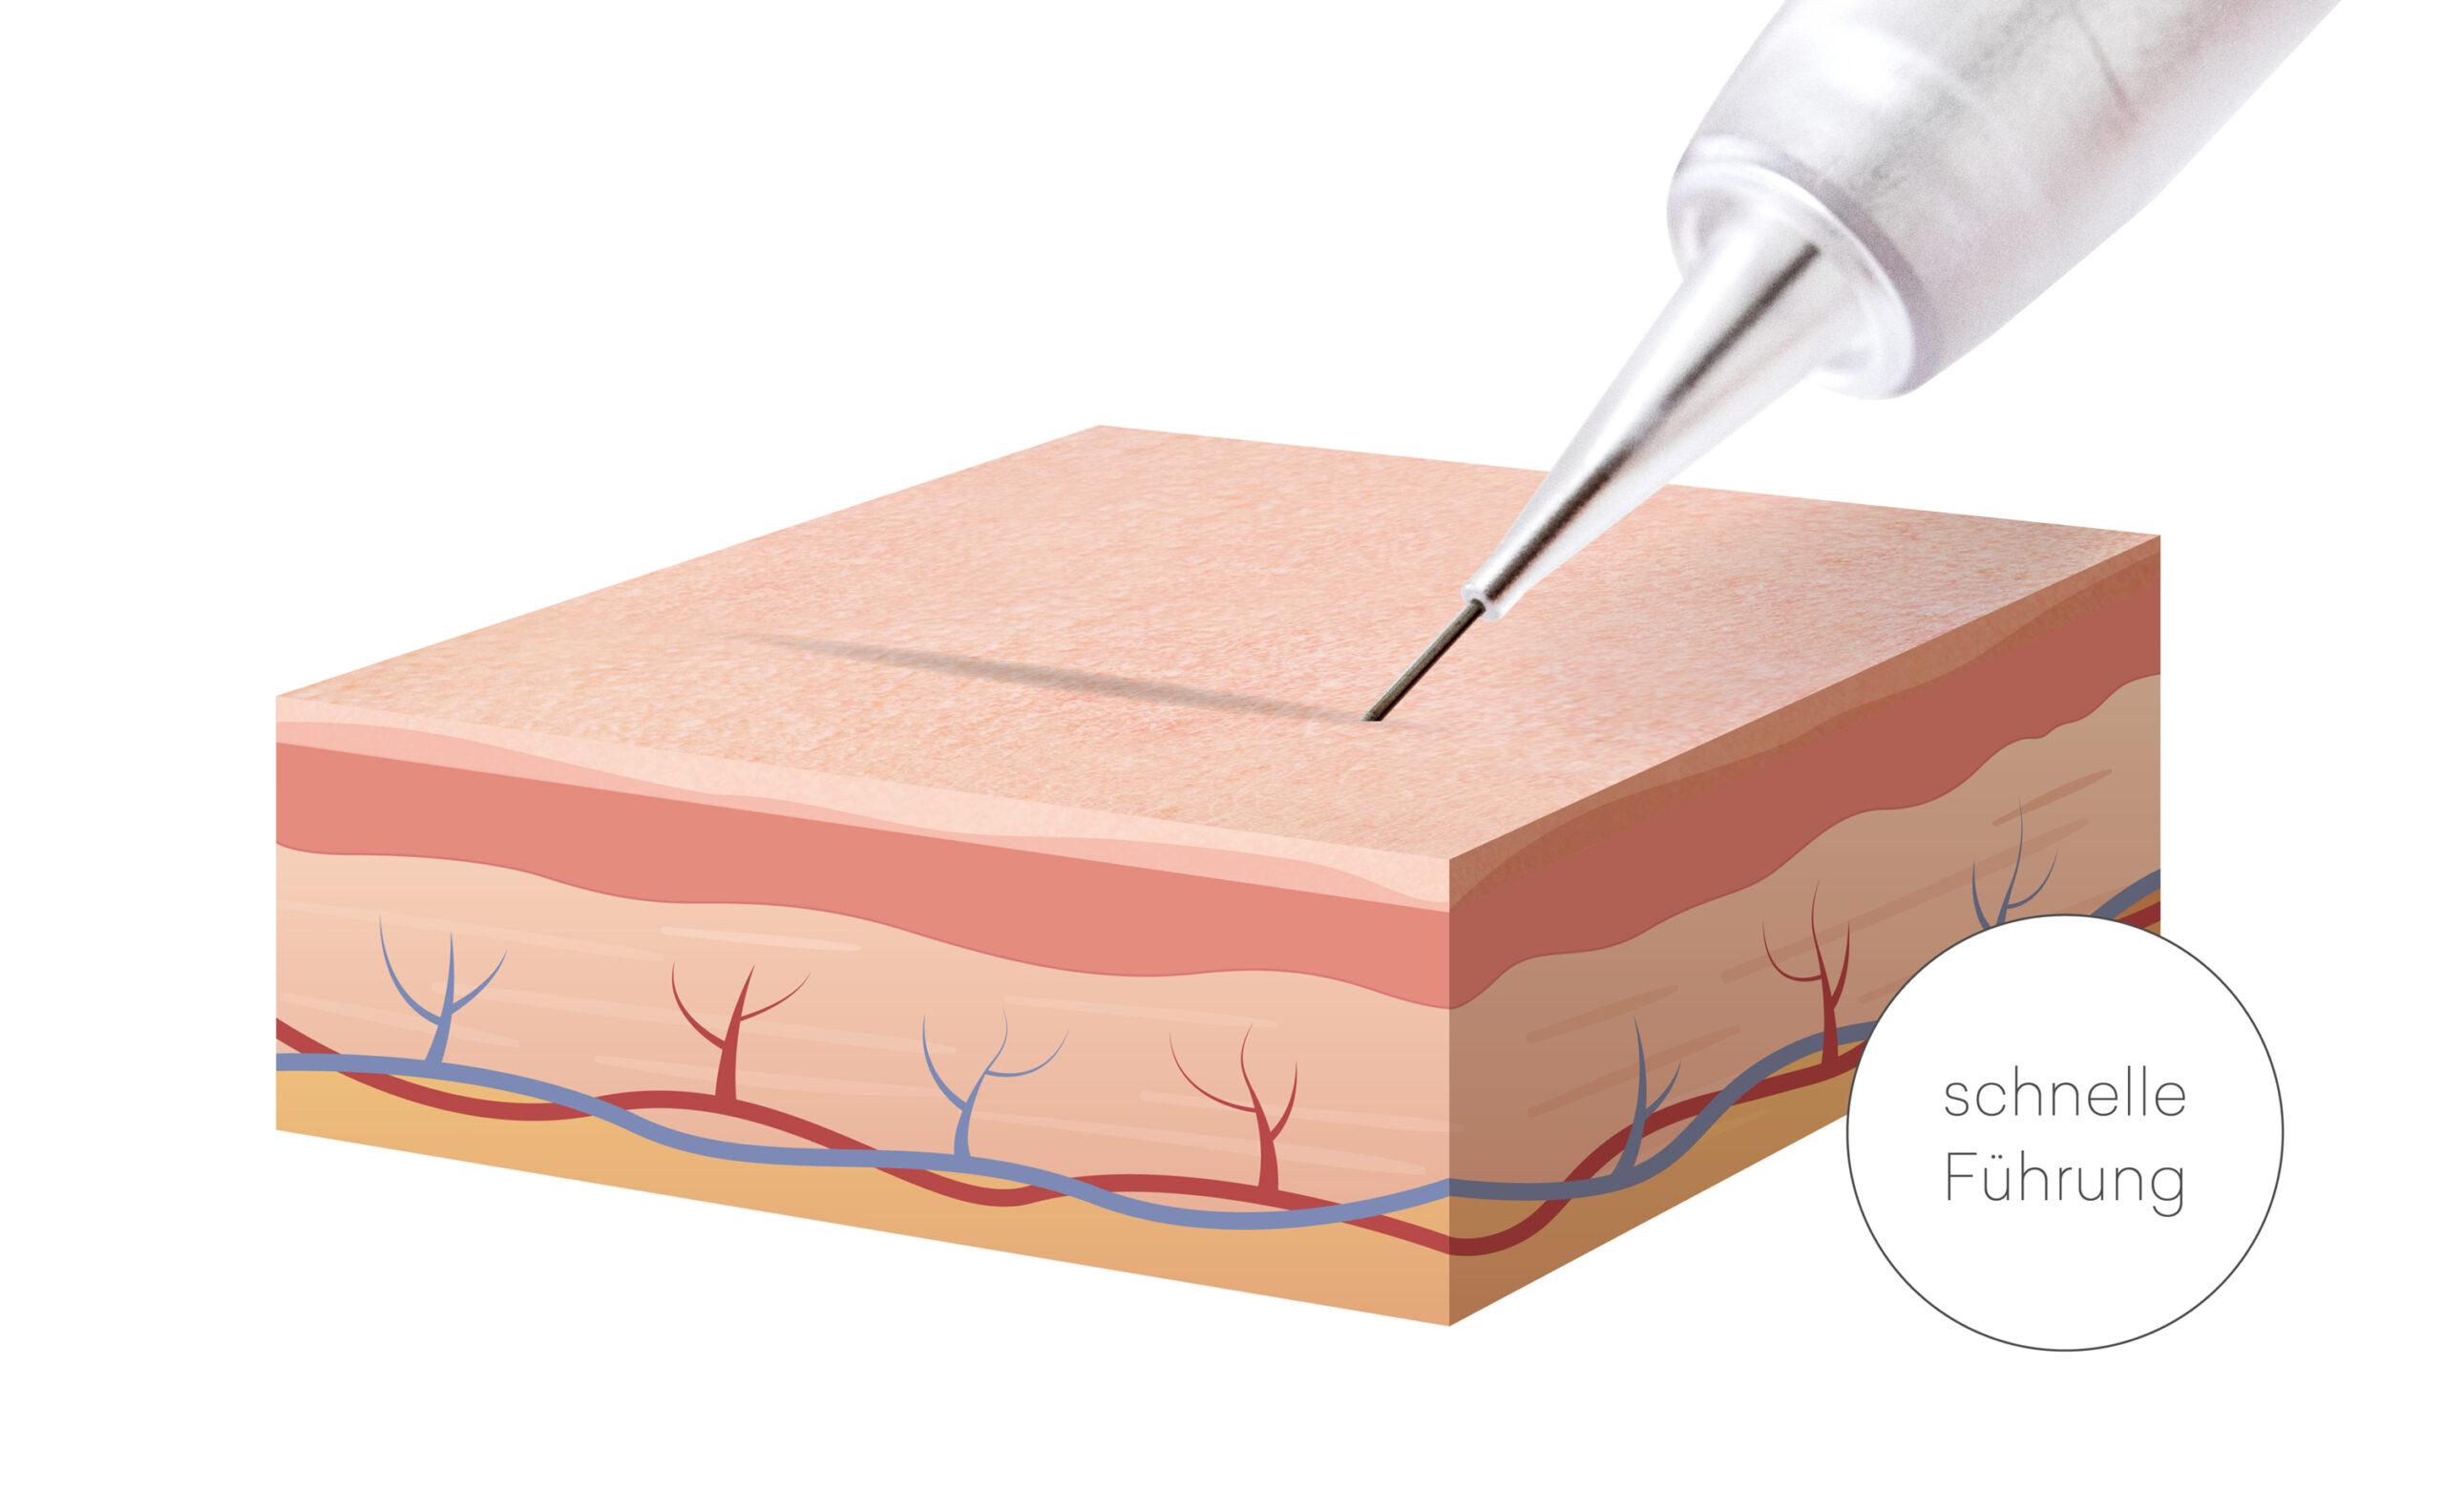
When moving the handpiece quickly, it is especially important to apply pigment to the skin only superficially, gently, and without pressure, using quick movements.
Very fast handpiece movement
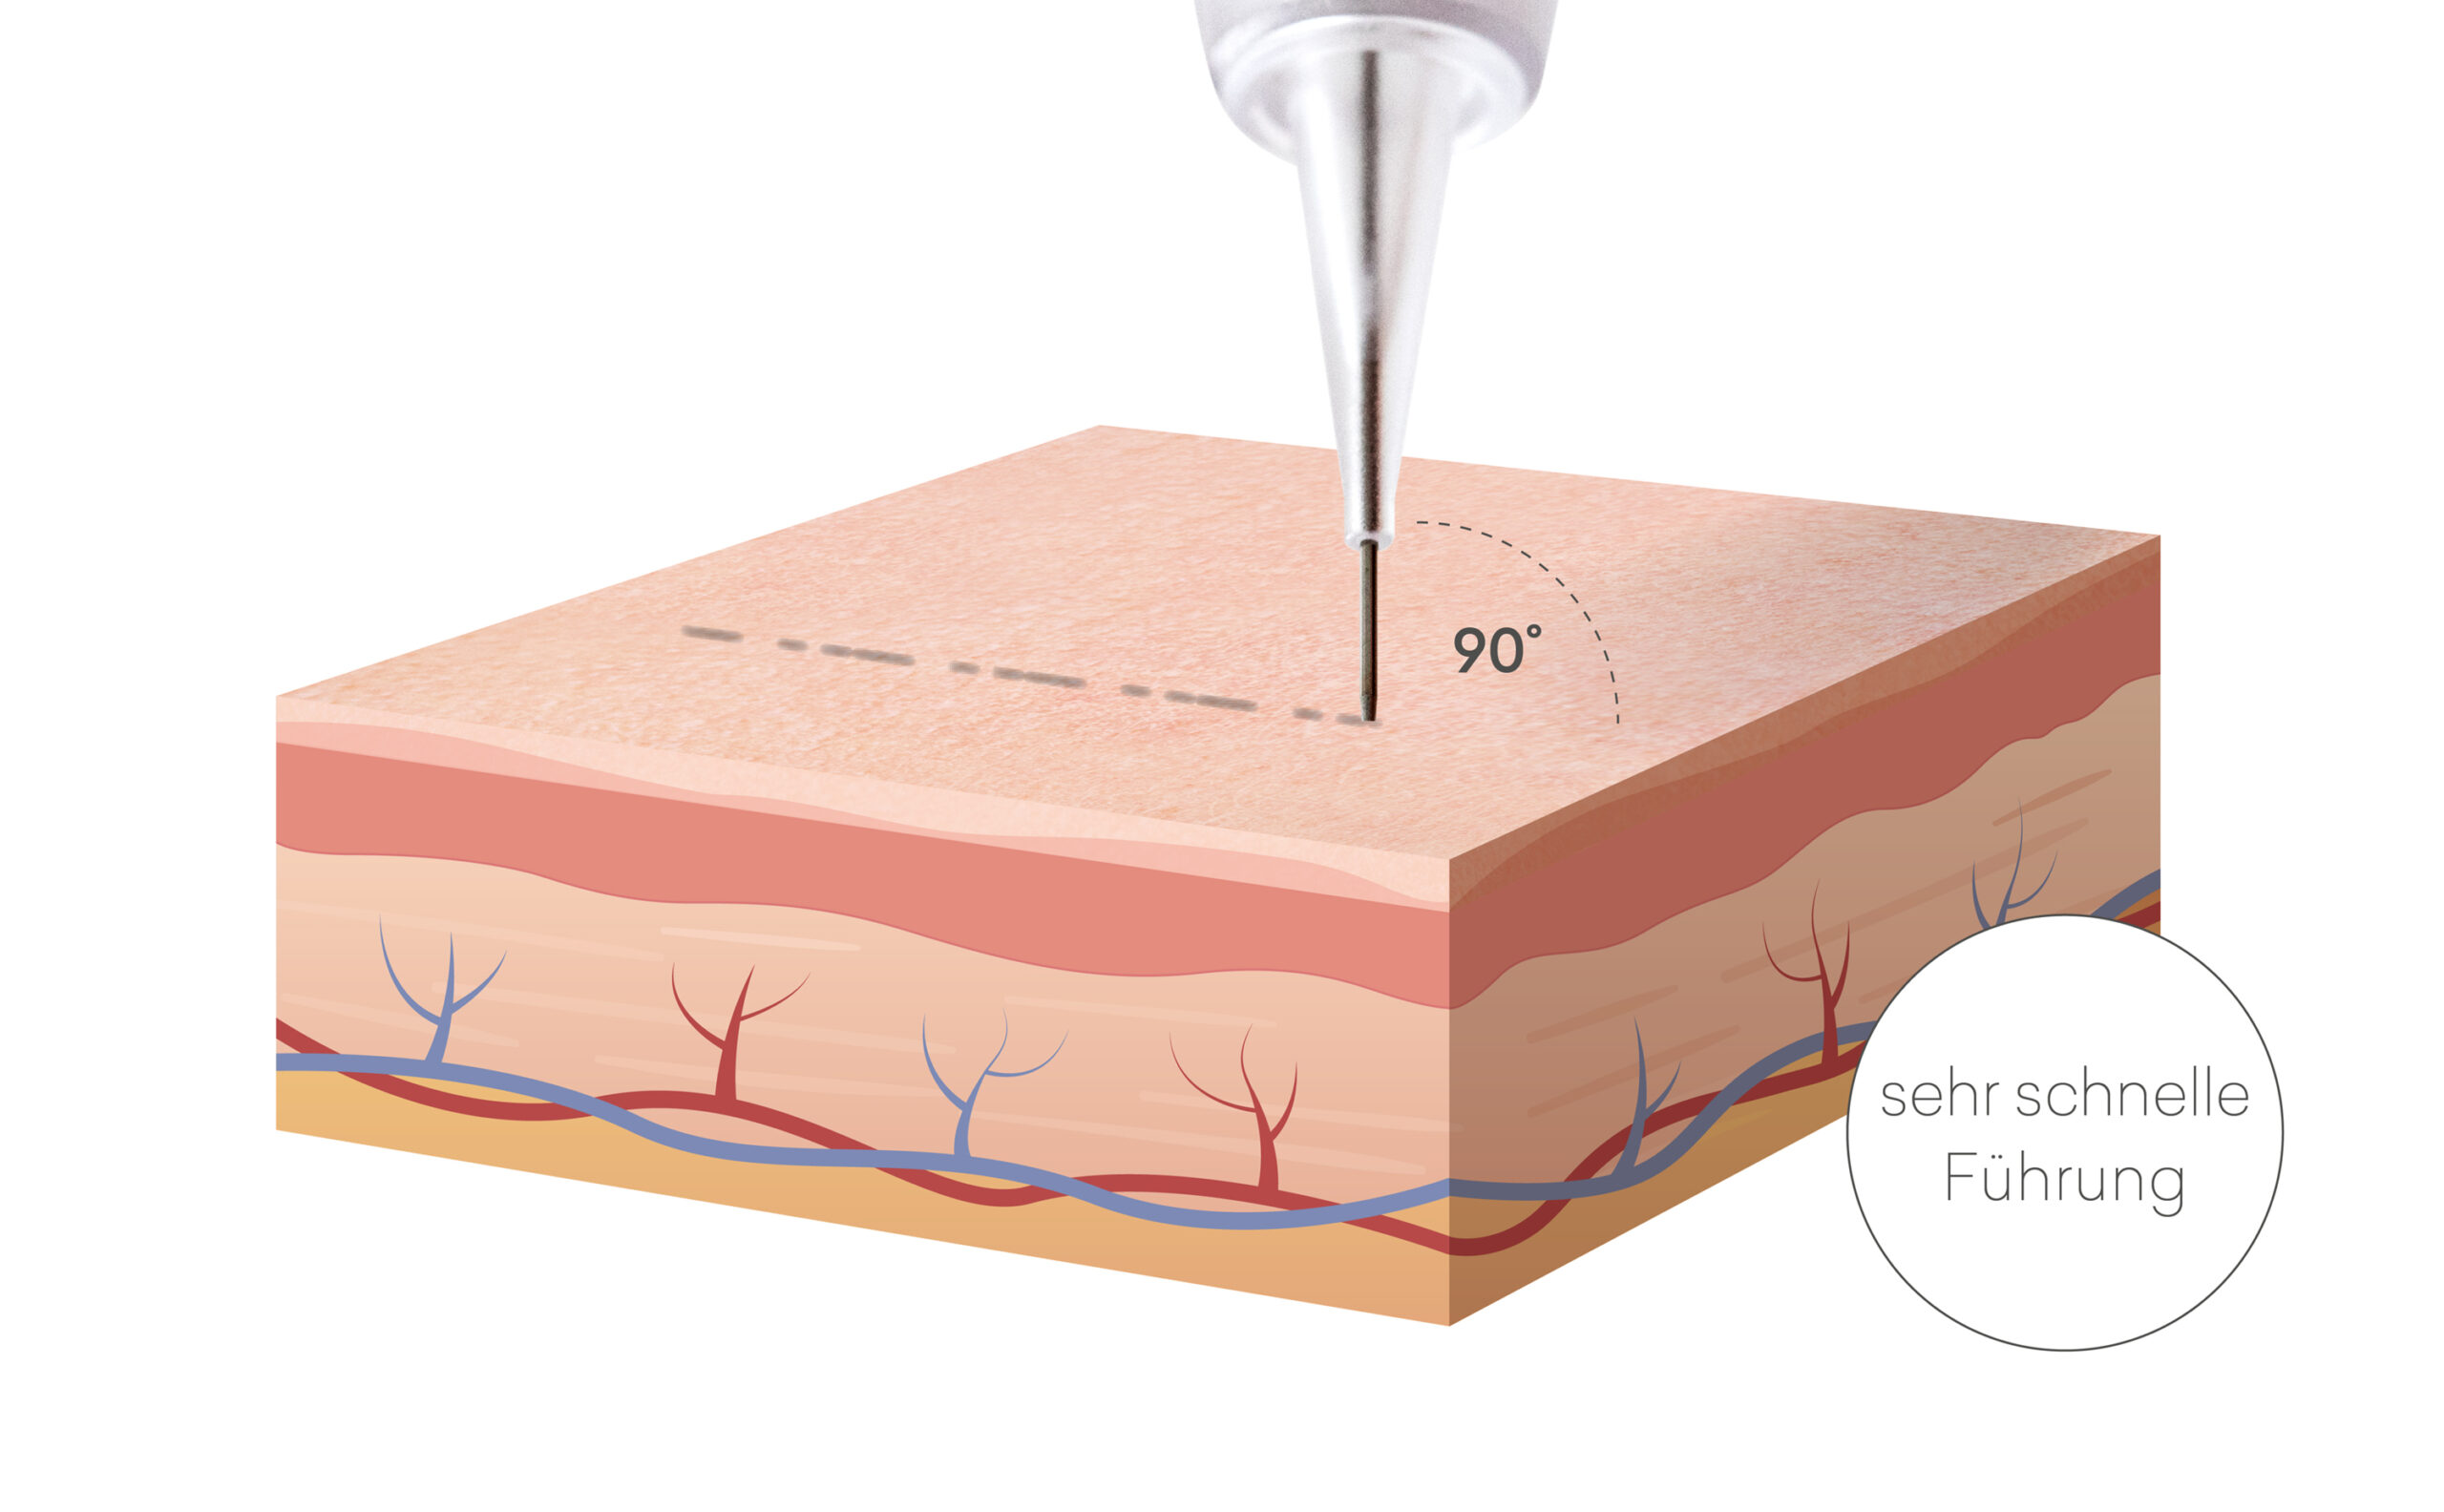
Very fast movements are used when applying pixel-effect shading to the lips. These movements should be practiced thoroughly to achieve optimal results.
Stitch depth
Nicht nur die Geschwindigkeit der Handstückführung, sondern auch der Druck, den du auf das Handstück ausübst, ist wesentlich. Unterschiedliche Stichtiefen führen zu unterschiedlichen Ergebnissen.
Techniques for Handling the Handpiece
Spring Technology

With this technique, you simply let the handpiece „flutter“ across the surface of the skin without applying any pressure. The movements should be light and even.
Soft-Hand Technique
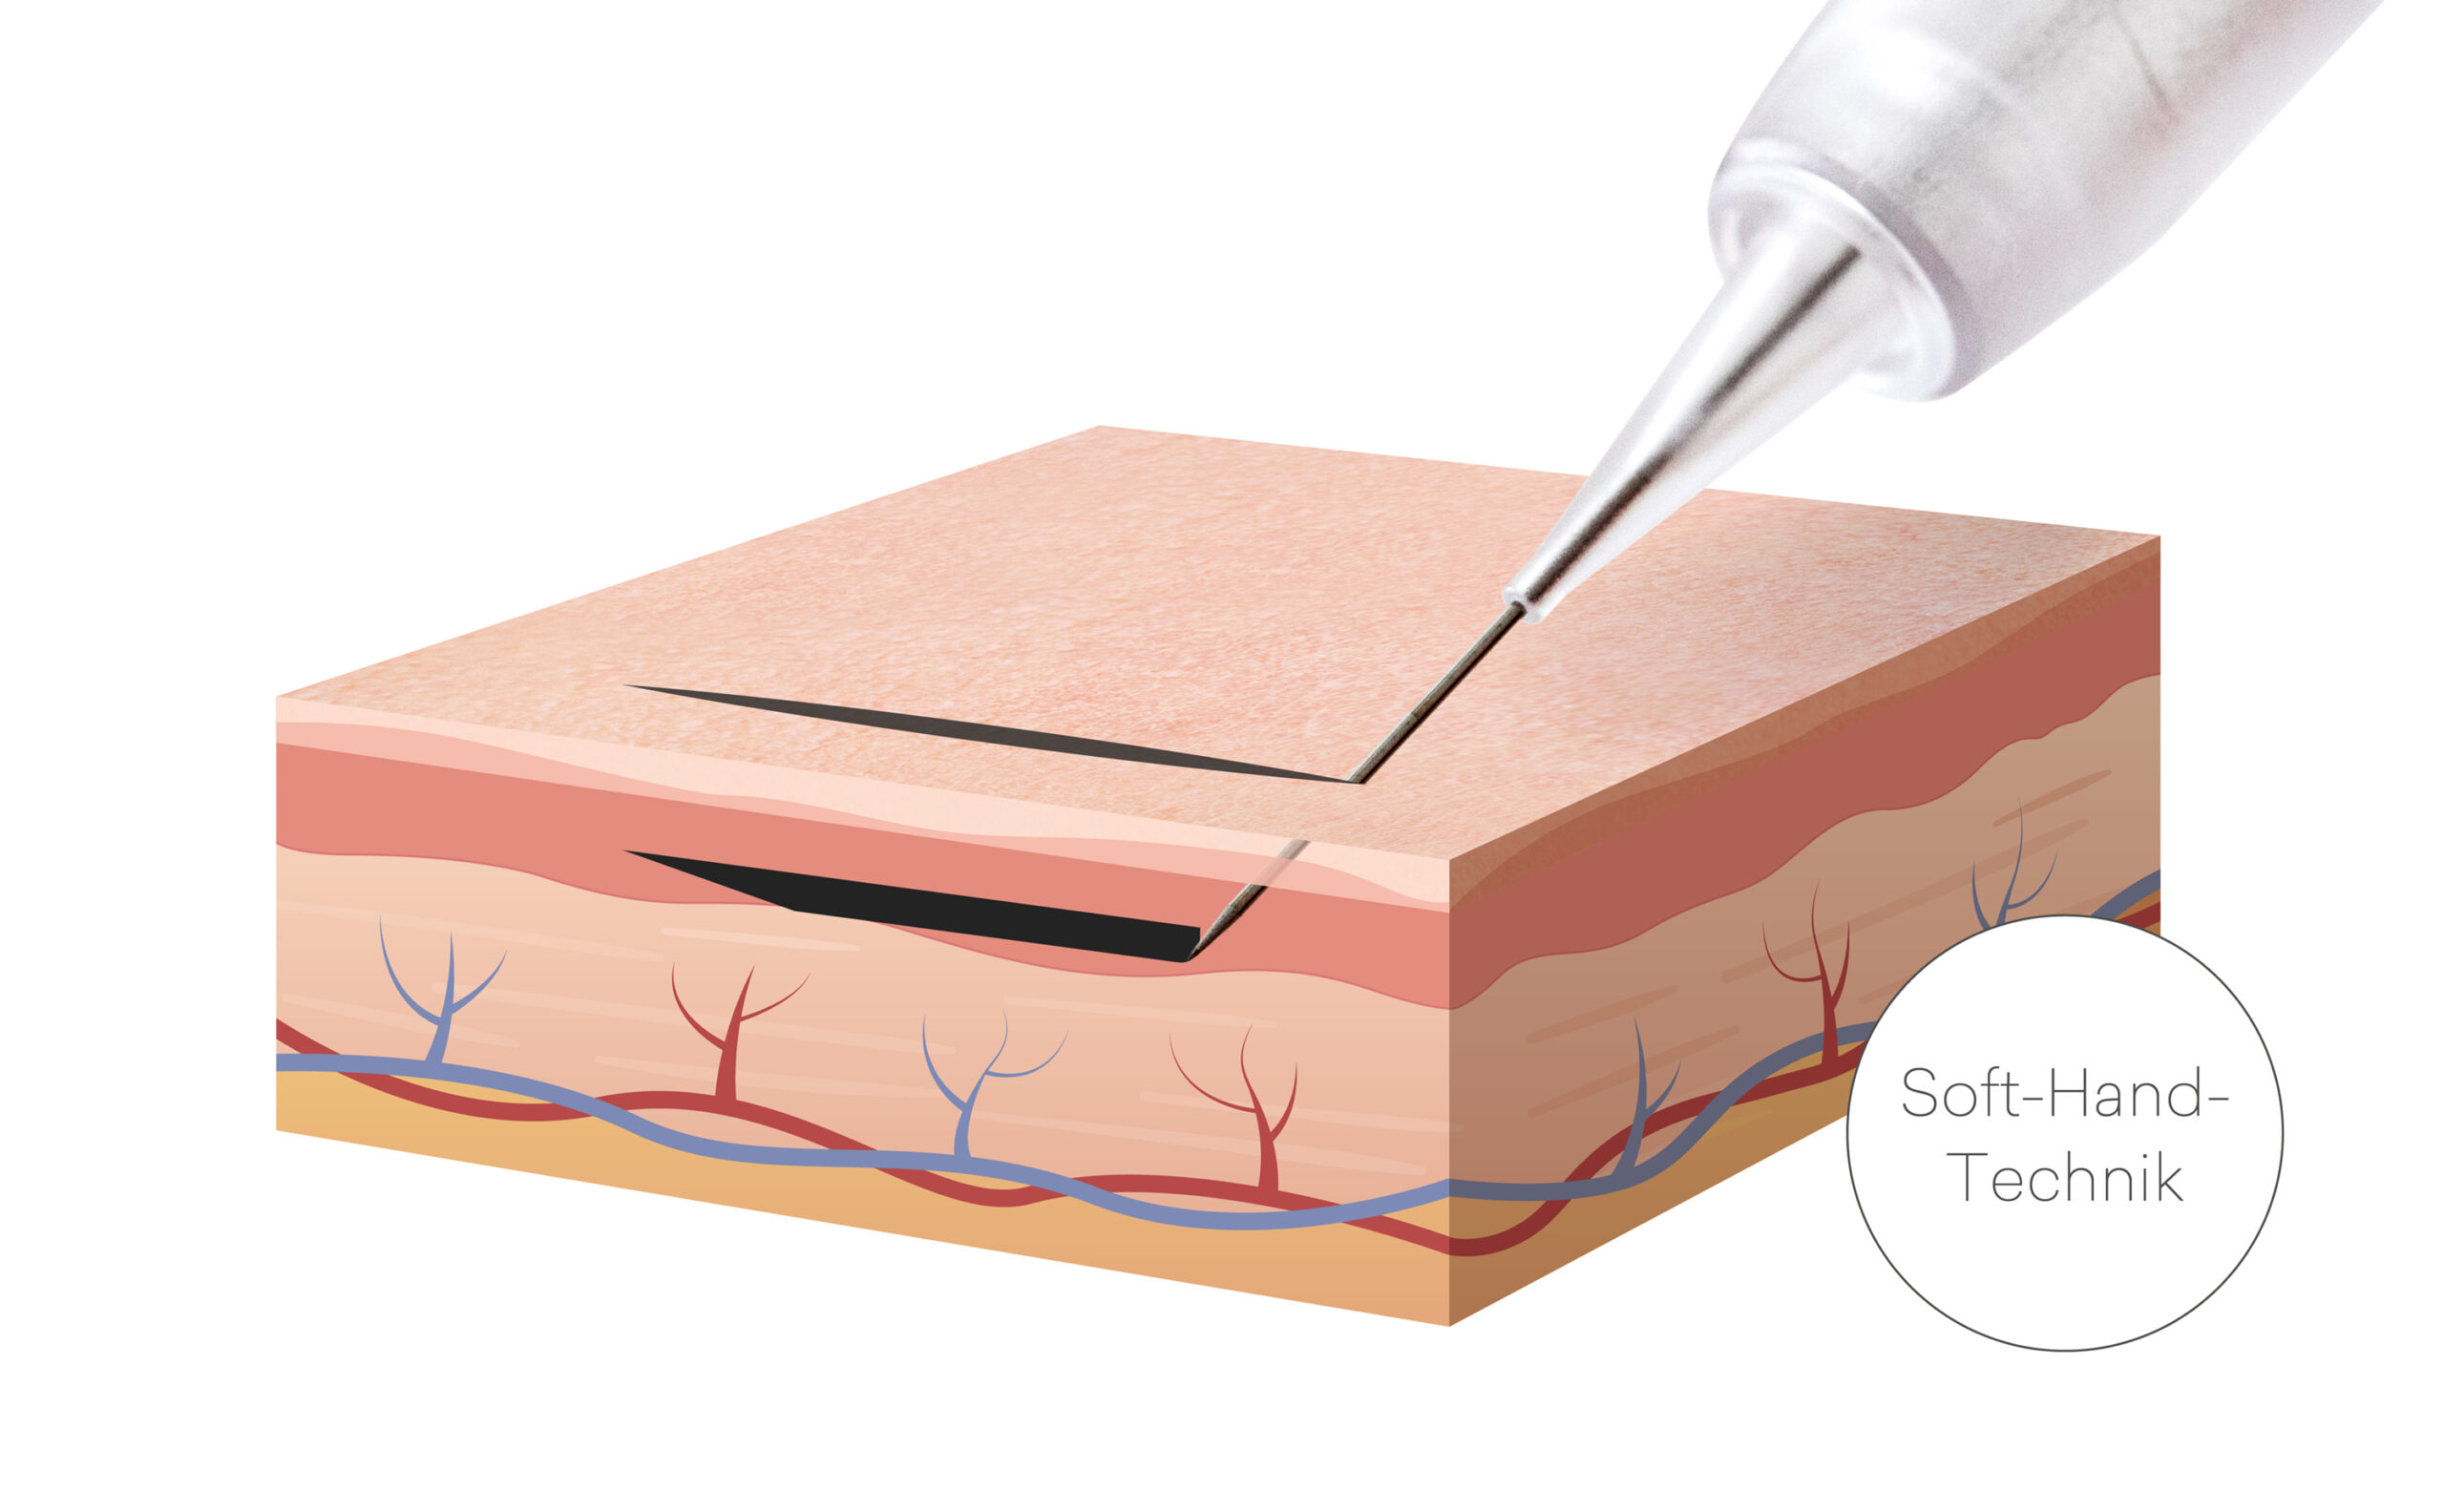
Using a steady hand and gentle pressure, color pigments are applied to the skin. The result is a rich, radiant color. Once the correct penetration depth is reached, a slight but distinct vibration can be felt in the fingers holding the skin taut.
Attention!
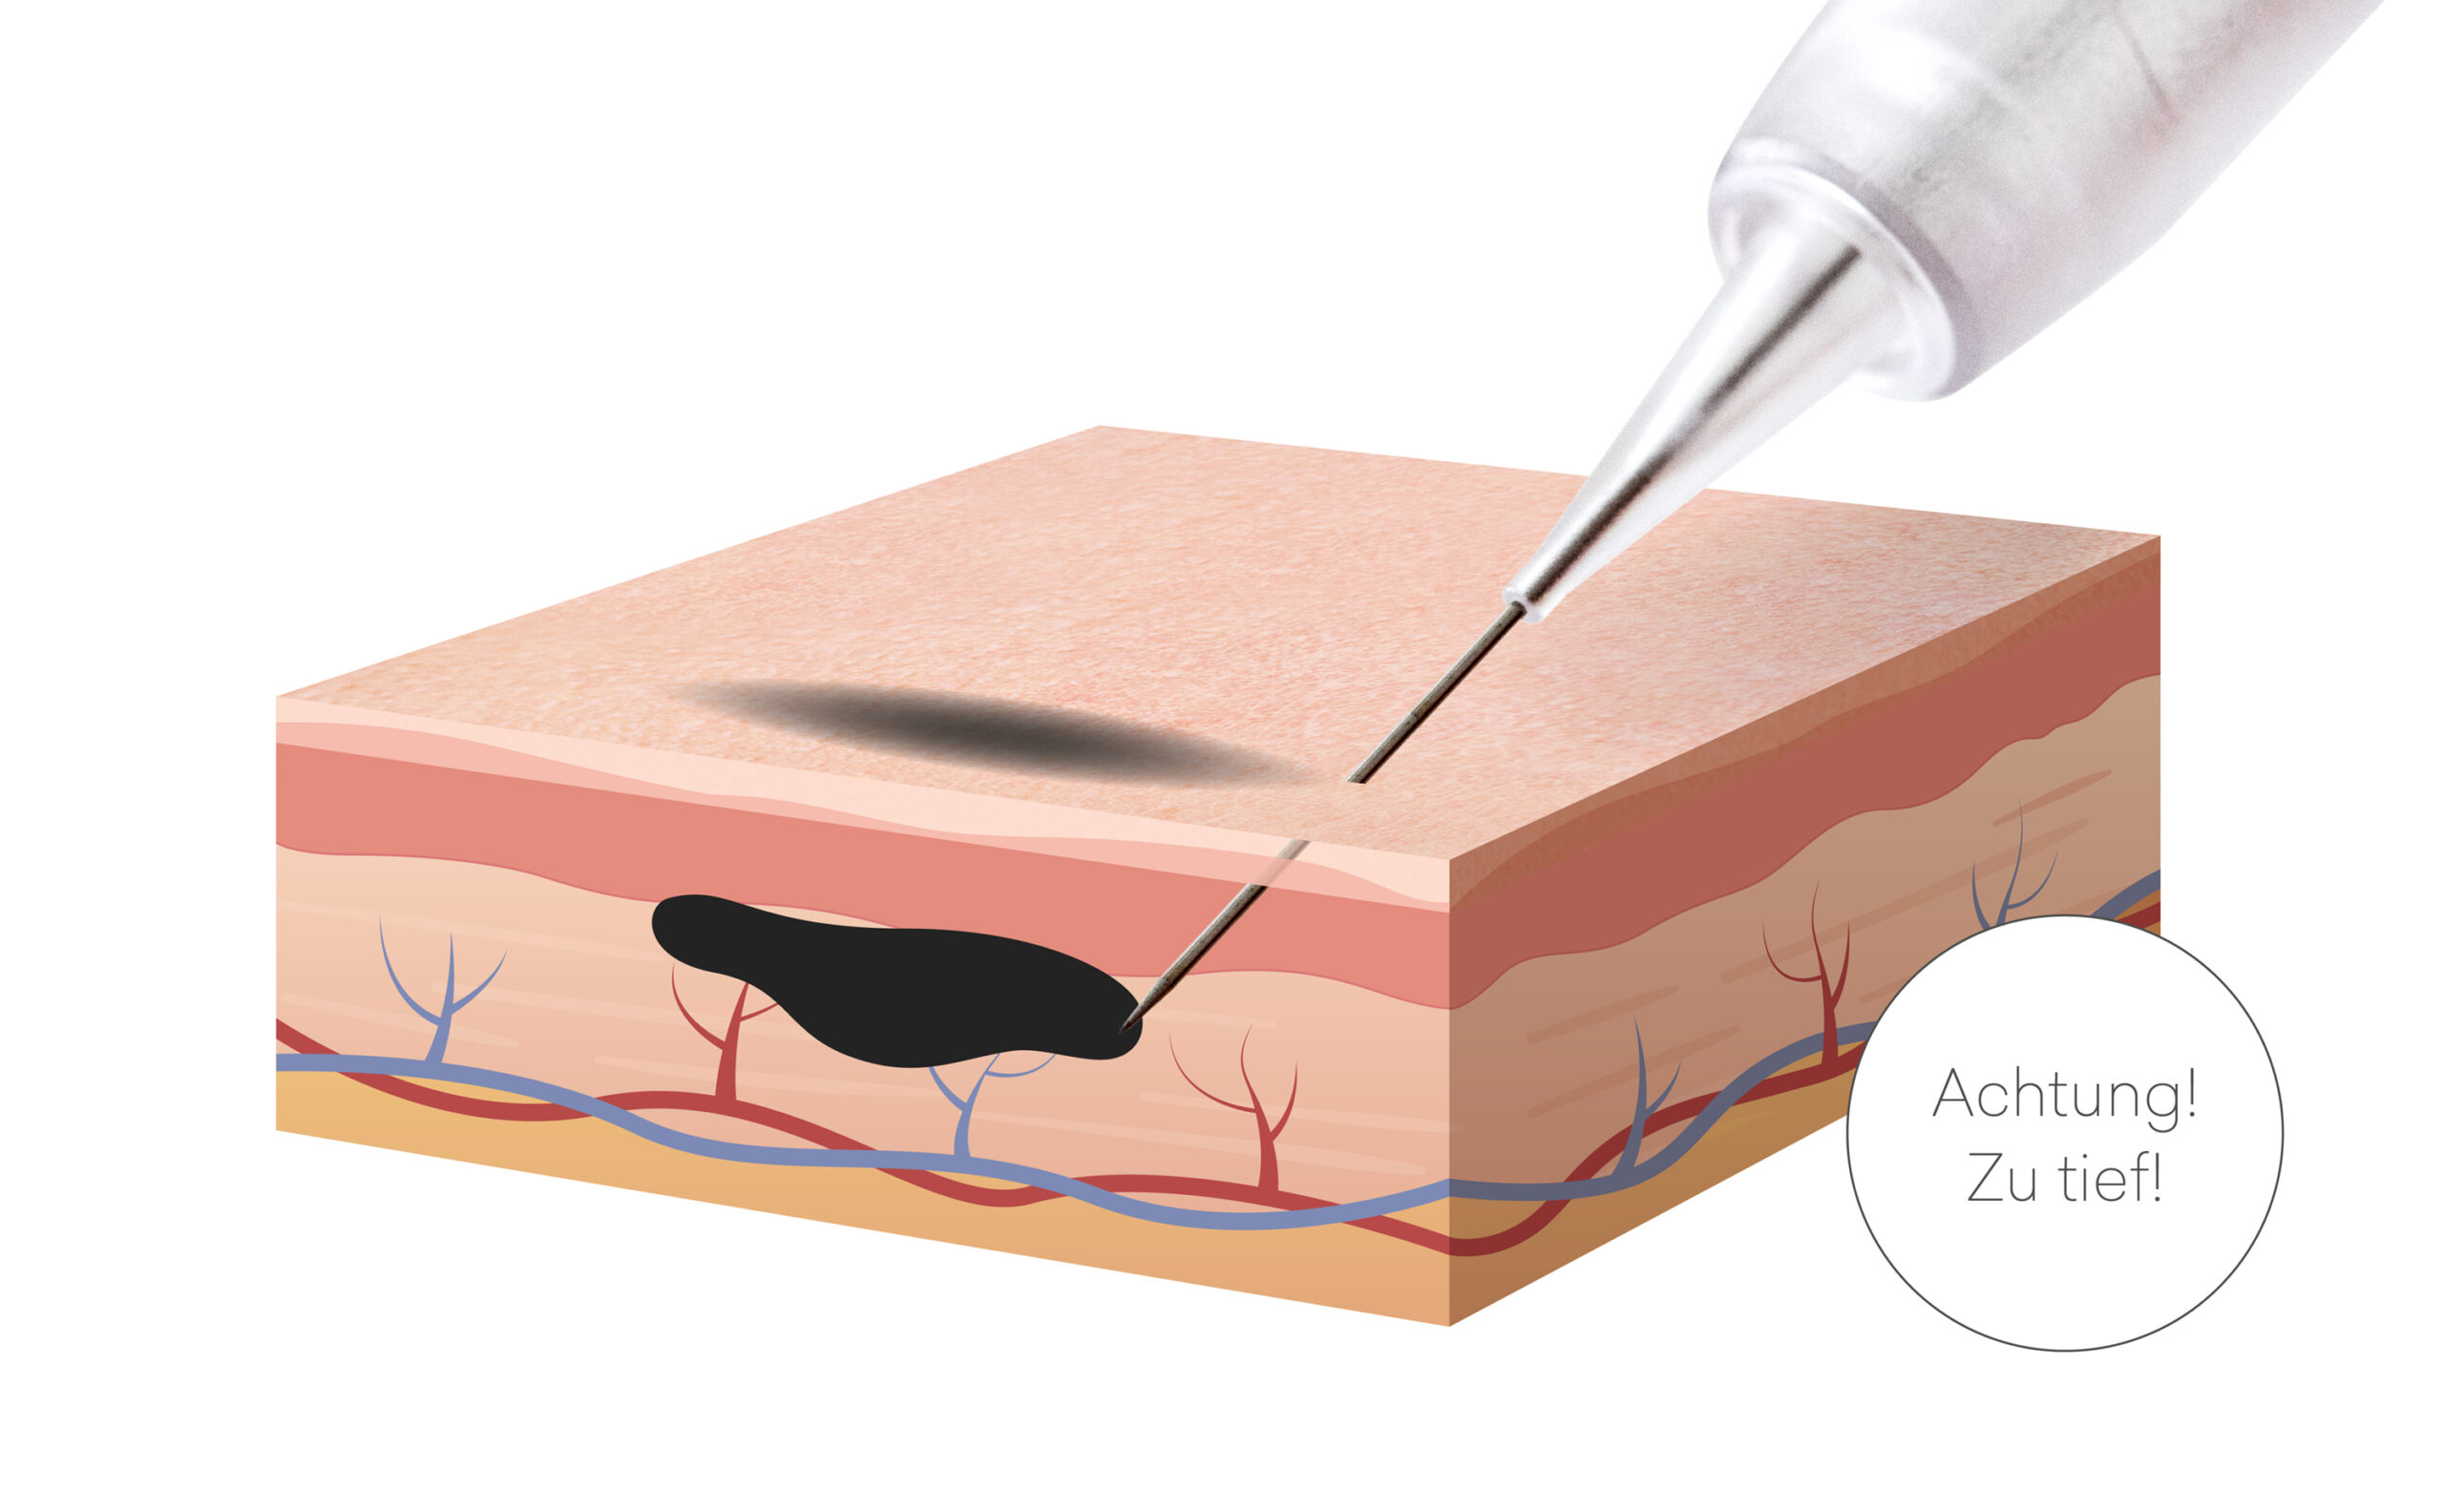
Wird zu tief pigmentiert, verliert die Farbe an Leuchtkraft und sie erscheint matter und dunkler. Bei zu tief pigmentierten Stellen kann es zu Fleckenbildung kommen. Außerdem sind eine verstärkte Krustenbildung und eine langsamere Wundheilung möglich.
Für ein perfektes, ebenmäßiges Farbergebnis sind eine gleichmäßige Handstückführung und Stichtiefe maßgeblich. Achte während des Pigmentierens außerdem auf eine gute Hautspannung.
Der Winkel der Handstücks
In addition to handpiece guidance and speed, the angle of the handpiece is also crucial for achieving a perfect result in permanent makeup.
Vertical Guide/90 Degrees
If the handpiece is held vertically, it is very easy to draw curves and rounded shapes. However, when held this way, the needle channel is shorter and delivers less ink. At the same time, more lymph fluid may be released, which can flush the ink out again.

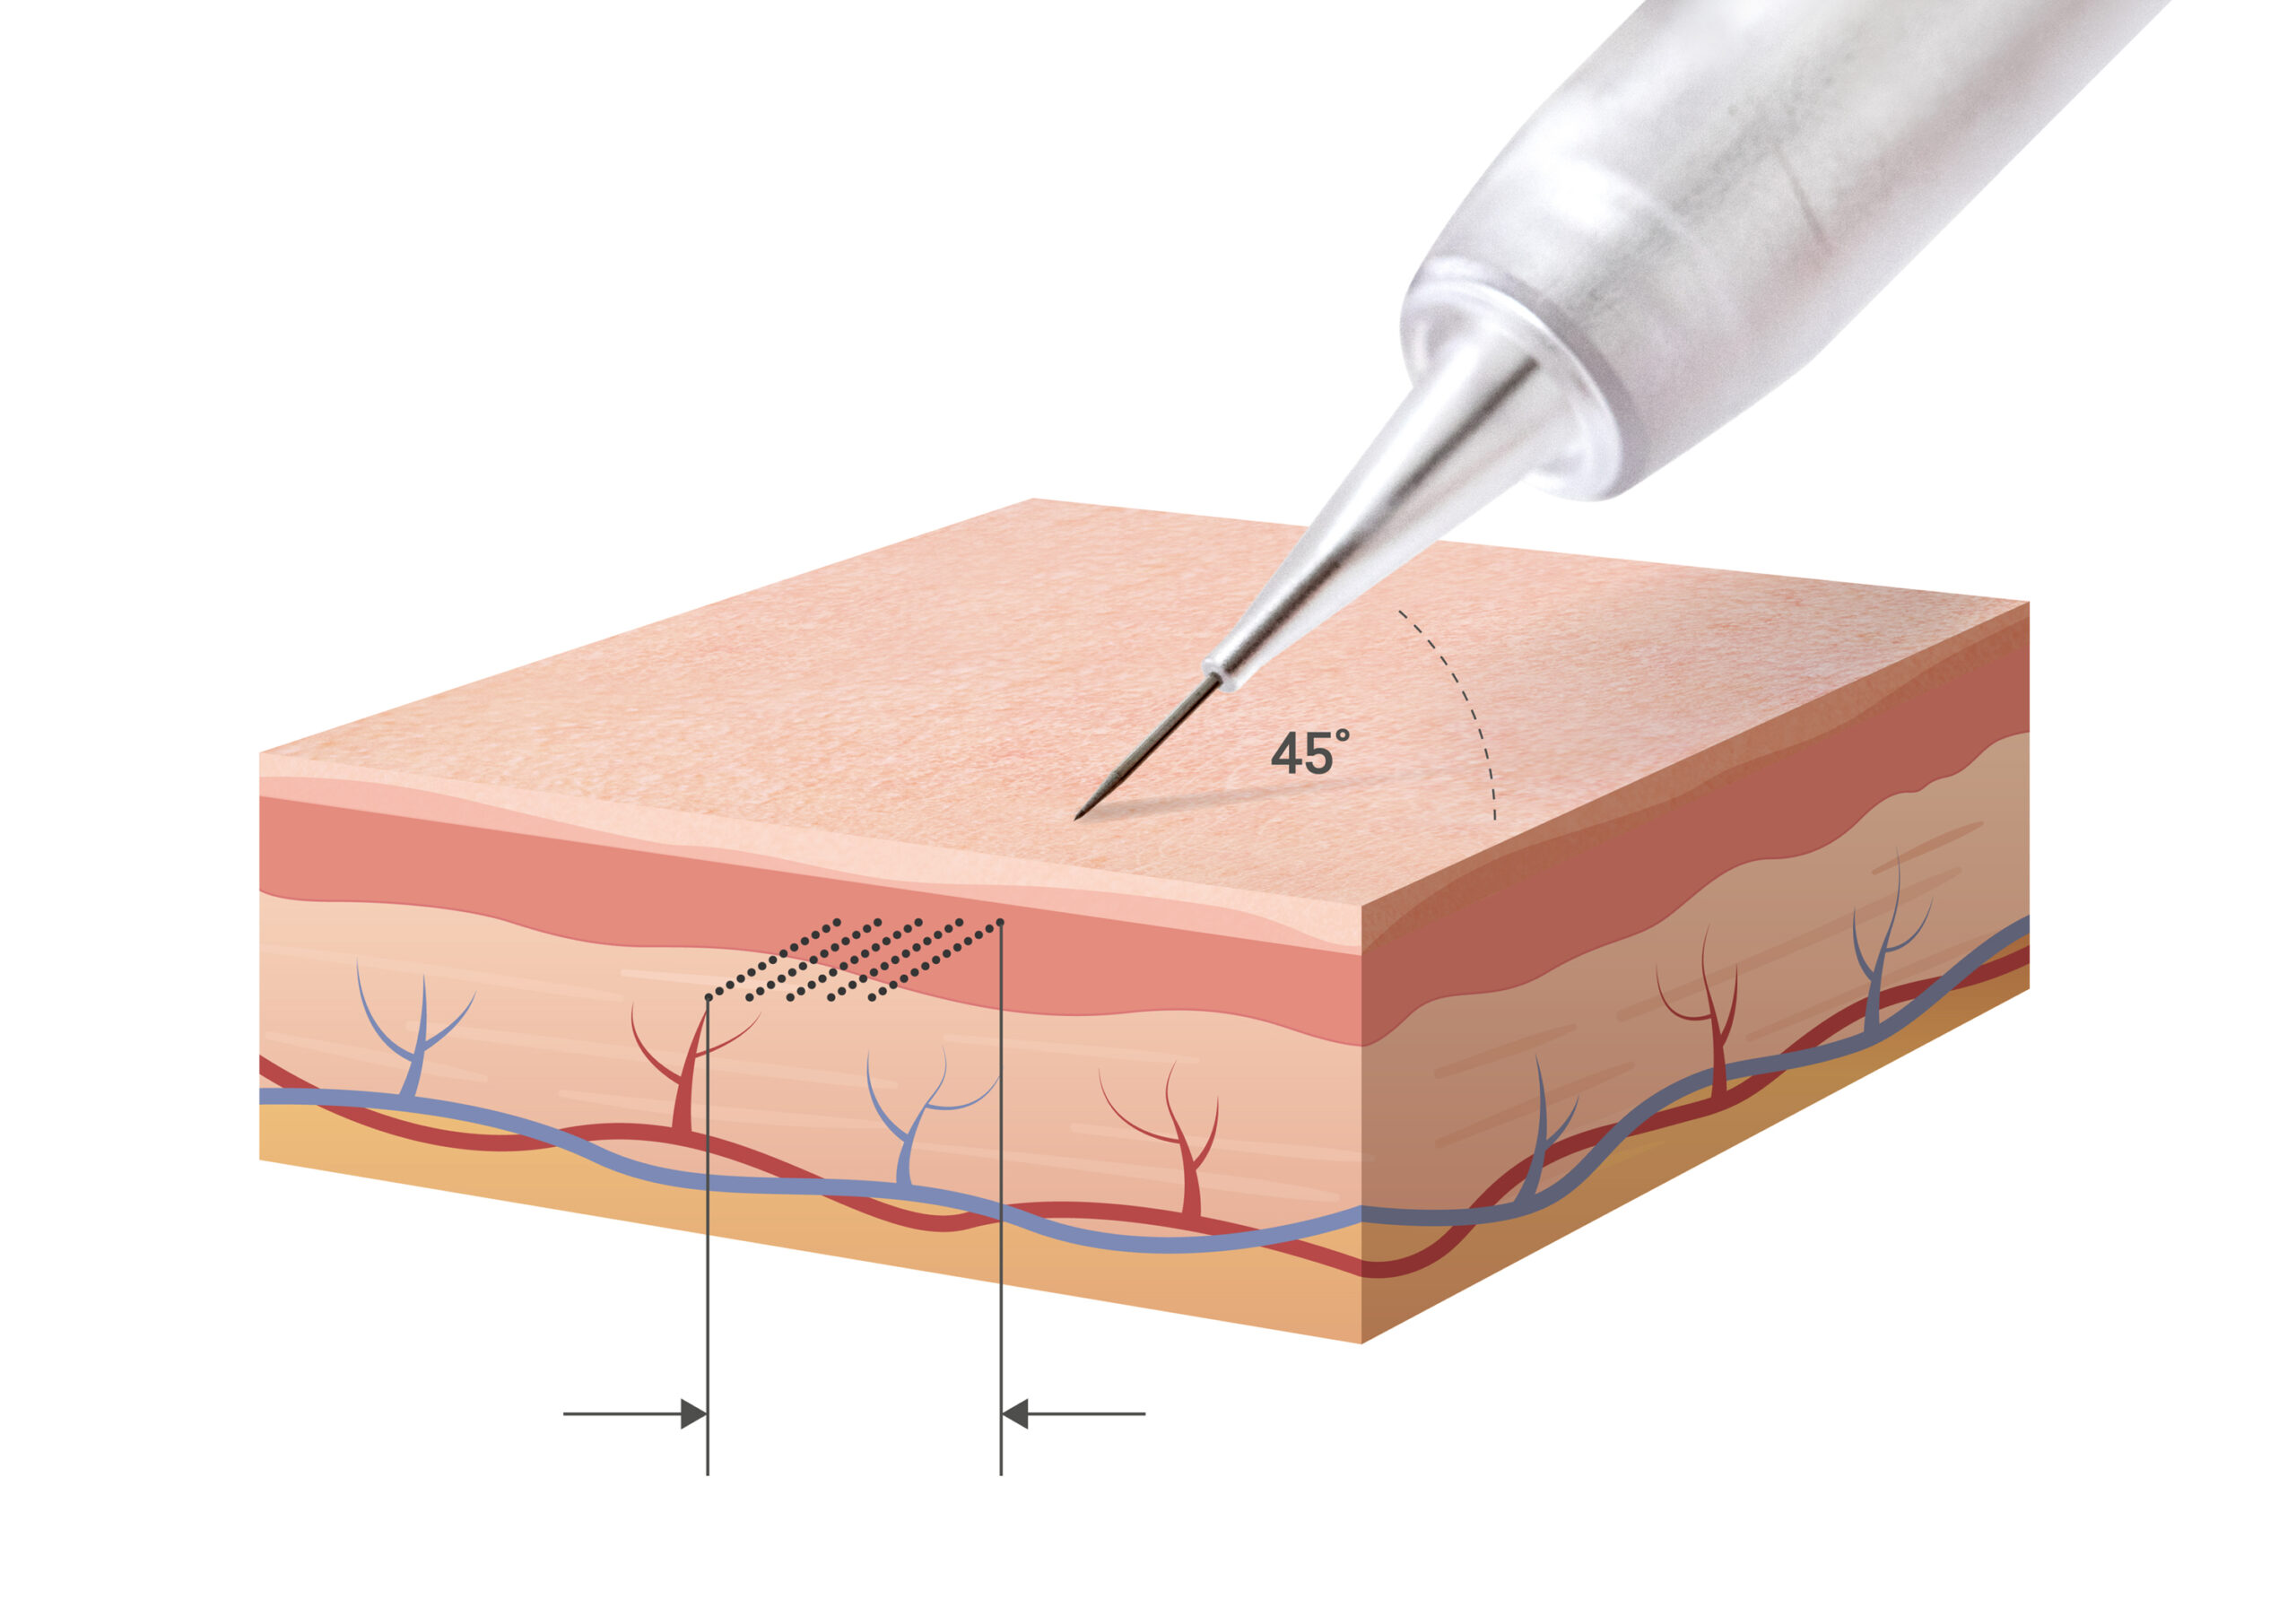
Slightly angled guide / 60–45 degrees
Holding the handpiece at a slight angle allows for faster ink absorption, as the needle channel is significantly longer, enabling more ink to be deposited into the skin. Additionally—unlike when held vertically—less lymph fluid is released. The skin is less „traumatized,“ resulting in greater treatment comfort for your clients. The slightly angled technique is the most commonly used pigmentation technique.

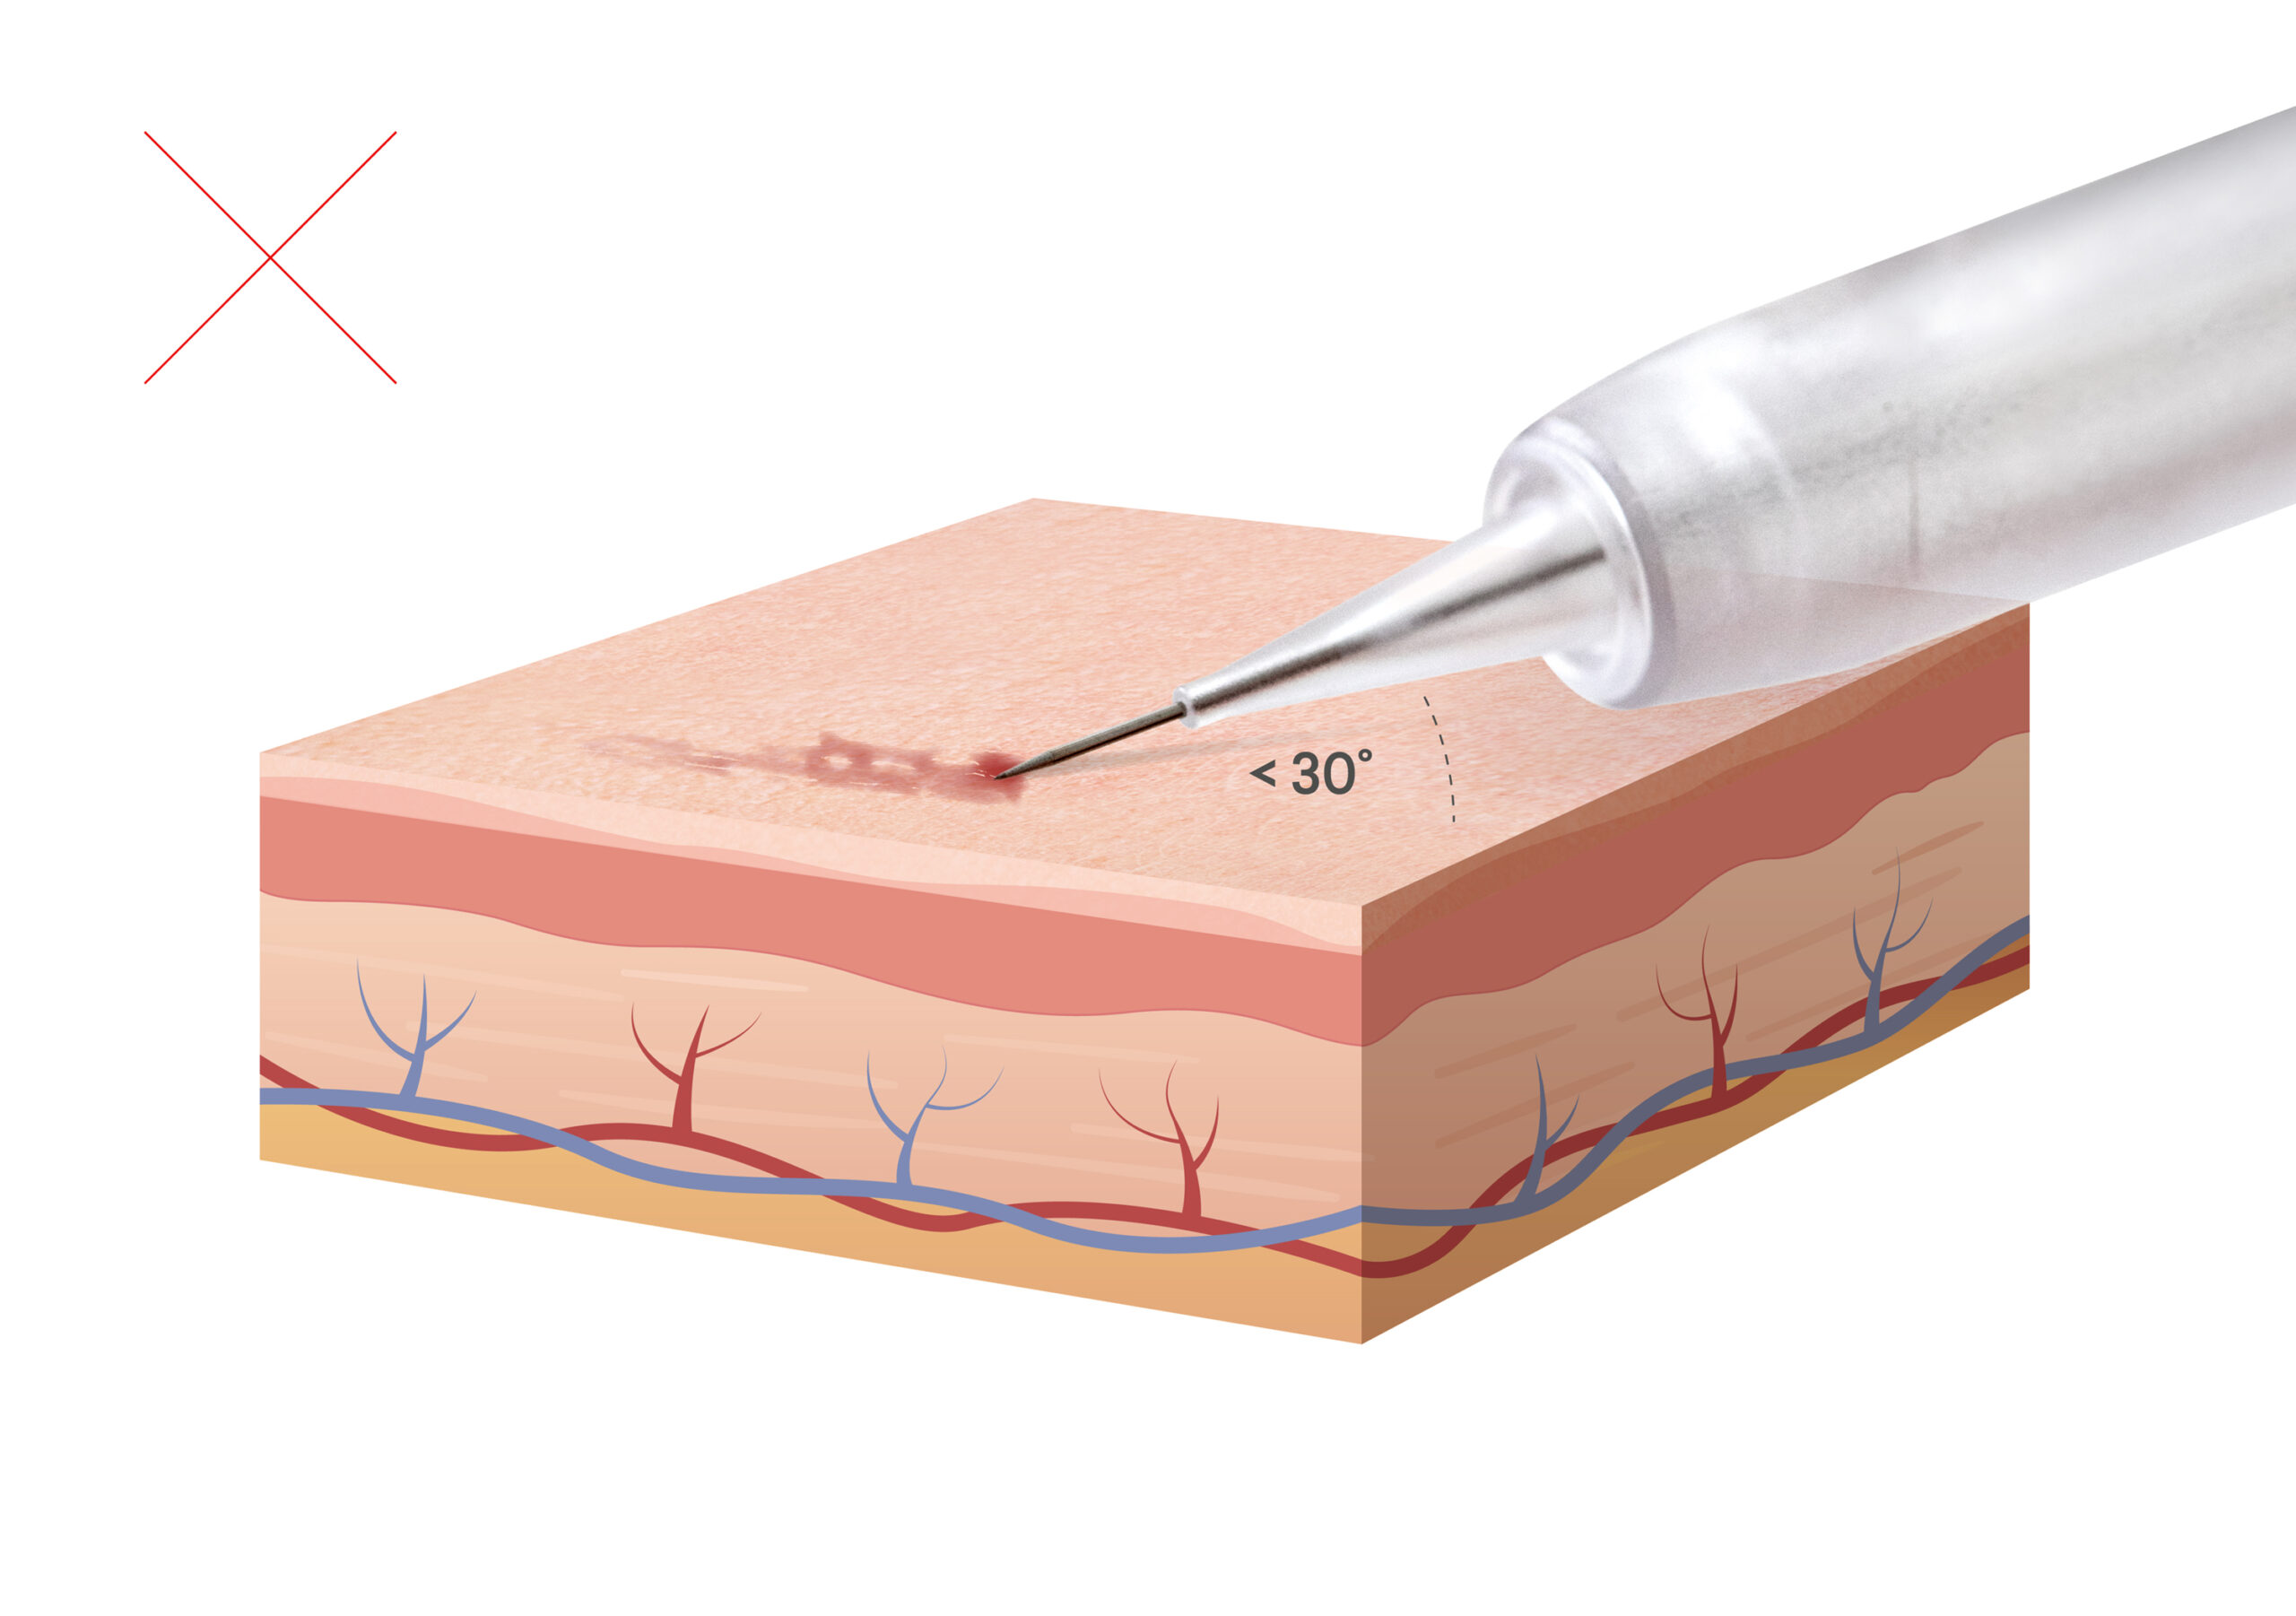
Very steep incline/45–30 degrees
Since this technique applies a particularly large amount of pigment, it is well-suited for large areas, such as extensive shading. It is also used on skin types that have difficulty absorbing pigment.
Since this technique can more easily lead to injuries, it should be used with caution. For this reason, it is rarely used.
Caution!
If the angle is less than 30 degrees, this can result in injury. Tissue is abraded, followed by scarring.
The Perfect Guide
It is recommended that you position the handpiece at an angle exactly in the direction of the mark.
In this position, you can work with even forward and backward strokes or with continuous lines in the direction of the stroke.
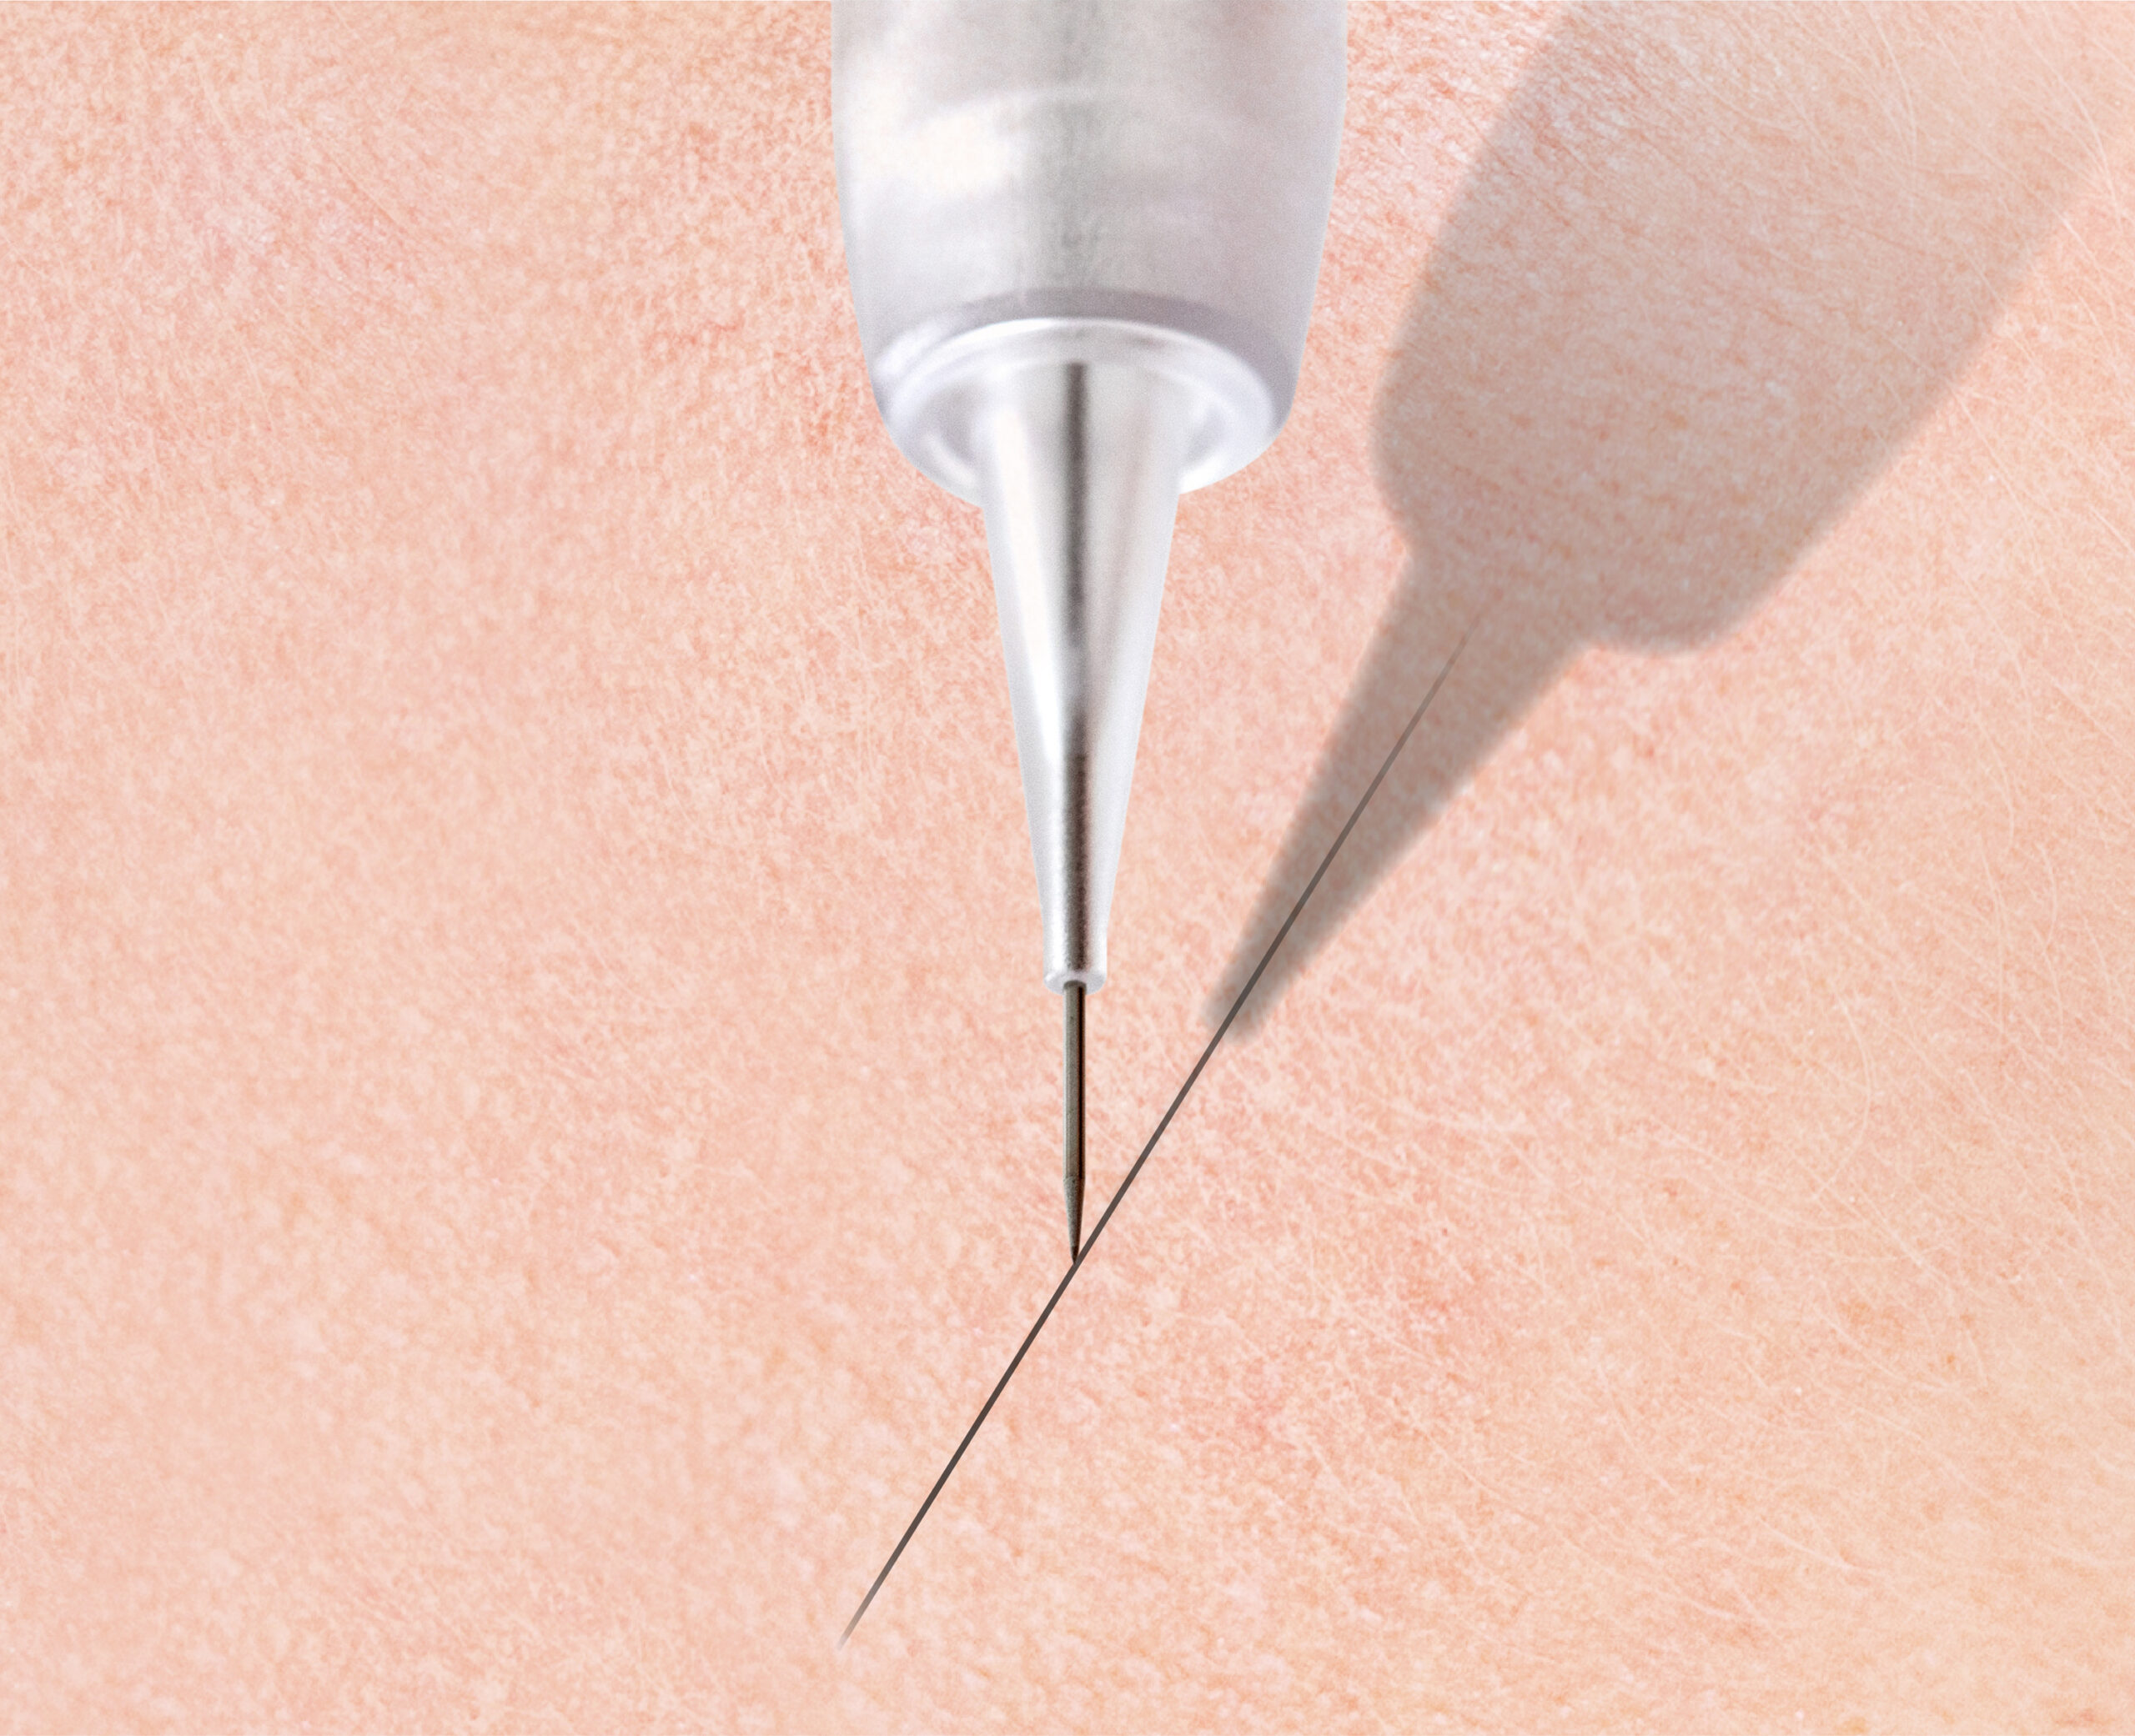
It is not recommended to hold the pen at an angle to the line, as the ink may bleed under the skin. This makes the drawings look messy and blurry.

The Art of Proper Movement and Line Work
The delicate, precise line

A fine, precise line is drawn with a slow movement in one direction. The slower the movement, the clearer the line becomes. The movement can be toward or away from your own body. The angle should be slightly oblique (no less than 60 degrees).
Für die feine, präzise Linie eignet sich die Soft-Hand-Technik am besten. Mit leichten, kurzen, gleichmäßigen Vor- und Rückwärtsbewegungen erreichst du eine präzise Füllung der Linie, falls diese lückenhafte Stellen aufweisen sollte.
The Bold Line

A bold, opaque line is achieved with smooth back-and-forth strokes. For precise shading, focus should gradually shift to individual areas. These can be filled in using steady, repetitive back-and-forth strokes. It is important to maintain a consistent stroke depth. Additionally, care should be taken not to linger when changing direction, but to continue working fluidly.
Pixel Shading and Gradients

With this technique, the needle is guided in a swinging motion. The handpiece moves more quickly and at a perpendicular angle. Depending on the selected needle size and the speed of the movements, finer or coarser, as well as opaque or transparent, pixel shading effects are possible. The more often the area to be pigmented is touched, the more intense the shading becomes. When the intensity transitions smoothly from a darker area (darker pixel shading) to a lighter area (lighter pixel shading), very elegant, eyeshadow-like effects can be achieved. Here, you can experiment with colors or black-and-gray tones.
Filling

In areas where solid coverage is needed, use closely spaced, crisscrossing lines. Vertical lines produce the best results. These are recommended, for example, when shading the lips.

Horizontal lines are used for precise filling.
The focus should be on individual areas, working centimeter by centimeter. These areas are filled in with even, repetitive back-and-forth movements.
Pendulum Shading
The pendulum technique involves using faster lines that are very close together. The length of the lines can vary. As the needle moves, it touches the skin only at the center. This swinging motion can be compared to a pendulum. With this technique, it is possible to create a smooth gradient (e.g., for lip shading).

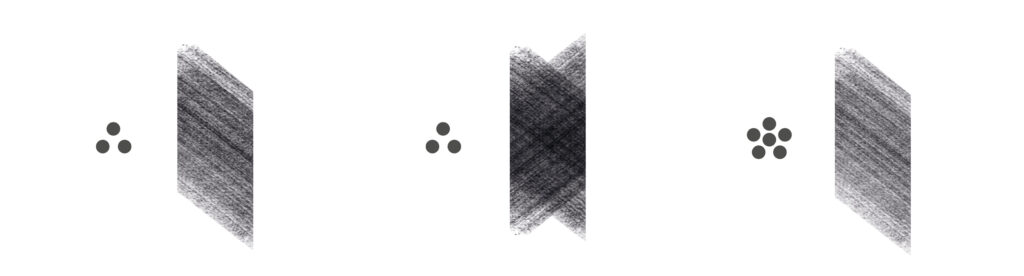
Smooth, even movements and gentle pressure are essential for optimal shading. The more frequently an area to be shaded is touched, the more intense the result will be. Be aware of possible skin reactions and the risk of discoloration.
Power Shading/Hiding
Powder shading creates a transition from a solid line to a powdery effect. This technique is used for lip shading. The guidance, pressure, and speed of the handpiece are crucial in this process.
The already compact line is touched only lightly to create a transition. To create the transition, lines that are close together—and may vary in length—are drawn using a back-and-forth motion. In areas where the powder effect is desired, the pressure applied by the handpiece is reduced.
