
Ombre Blush
Ombre Blush Technique
Discover the innovative Ombre Blush technique, which combines the nude effect with a trendy ombre highlight. This method is absolutely on-trend and offers a unique highlighting effect that makes lips appear natural yet special. It is gentle and easy to learn, so you can offer your customers a maximum wow effect with minimal effort.
1. Analysis of the form:
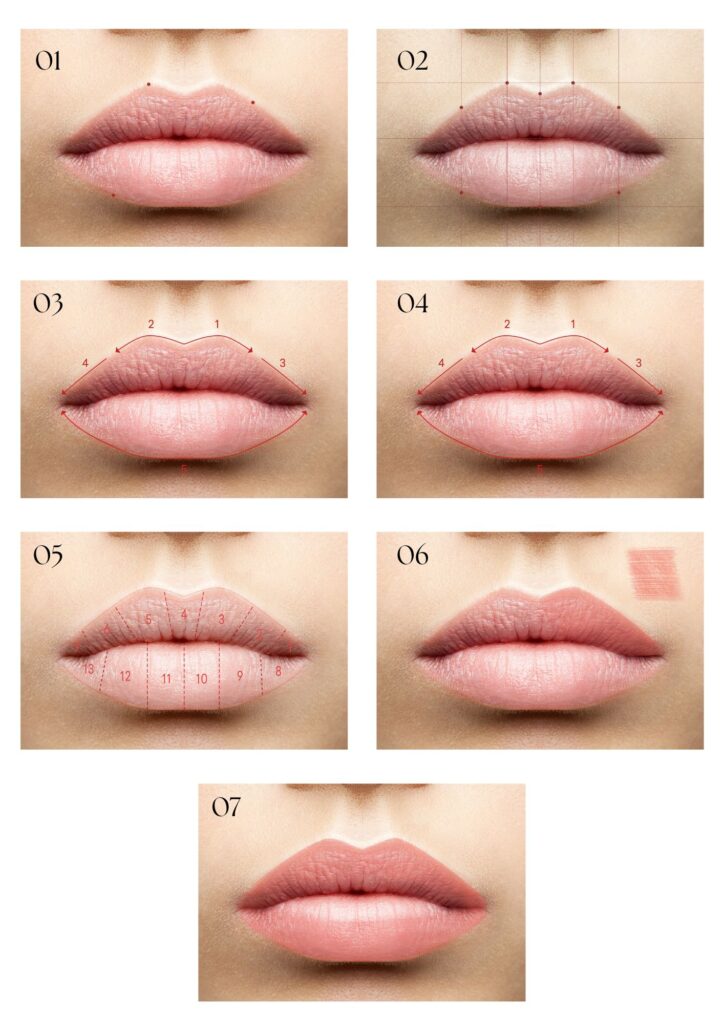
First analyze the shape of the lips.
2. Marking asymmetrical areas:
Mark asymmetrical areas of the lip shape with dots or strokes outside the lips to facilitate and even out the later sketching.
3. Optimal customer positioning:
It is best to mark the asymmetrical areas when your client is in a seated and relaxed position. Ask them to close their eyes to avoid facial expressions.
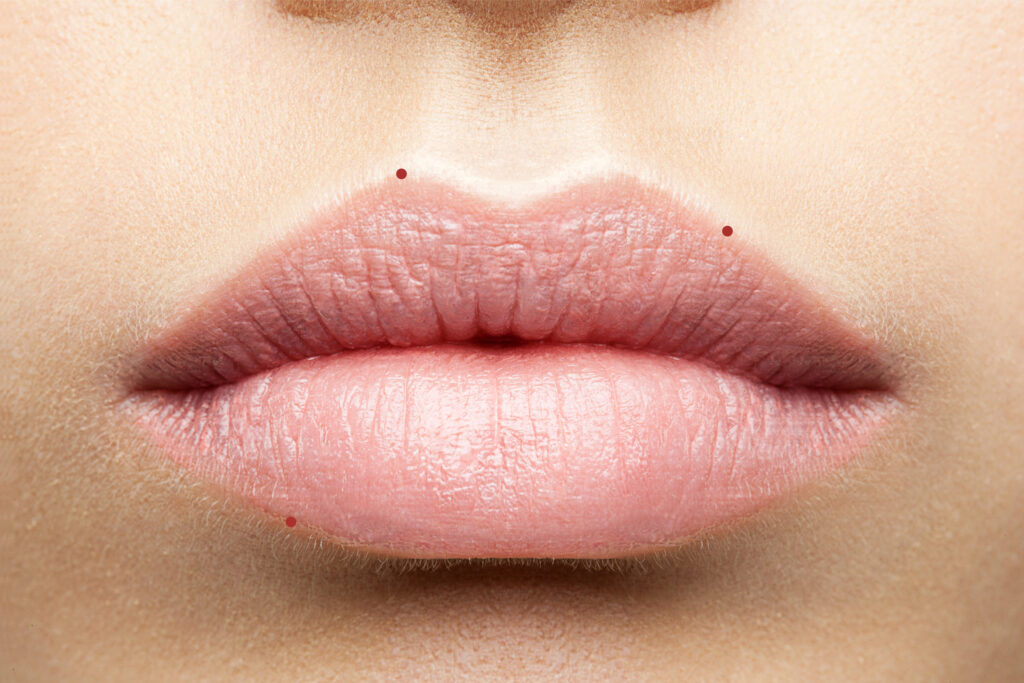
Further markings for preliminary drawing:
Make the preliminary drawing easier for yourself with additional markings outside the lip shape.
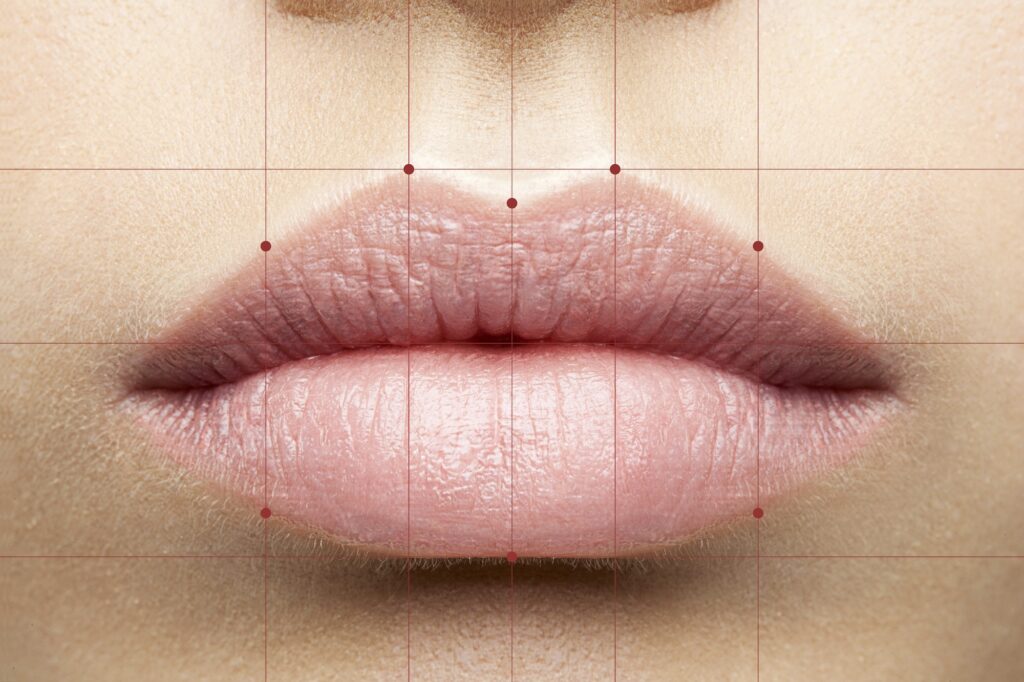
The preliminary drawing:
1. Start at the center of the lips:
Start by drawing the outline in the heart of the lips. First draw both lip arches before connecting the outline up to the corners of the mouth.
2. Pay attention to the natural shape:
Pay attention to a natural shape and avoid unnatural overdrawing. Stick to the natural lip line as far as possible.
3. Sew the lower lip:
Connect the outline of the lower lip from one corner of the mouth to the other.
4. Precise lines:
Draw precise lines with a well-sharpened pencil and smooth movements.
5. Skin fixation:
A slight fixation of the skin is sufficient to avoid mobility.
6. Check for symmetry:
Check the symmetry of the preliminary drawing and correct if necessary.
7. Upright position:
Always check the symmetry with your client in an upright, relaxed position.
8. Fill in the inner section:
Finally, fill in the inside of the lips to give your client an idea of the final result.
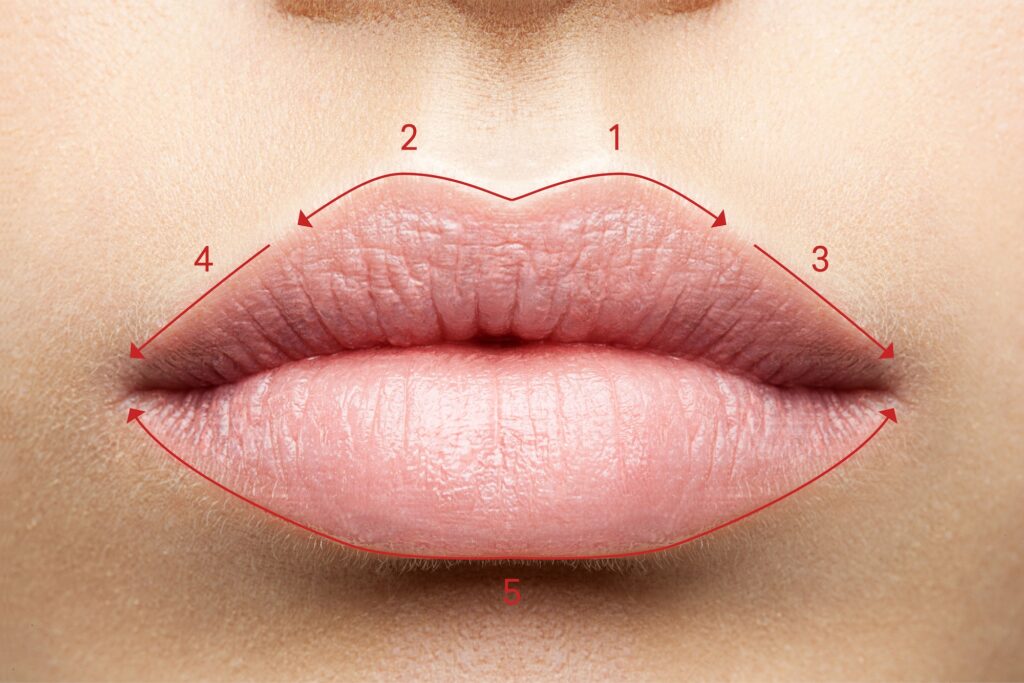
Pigmenting the outline:
1. Start at the center of the lips:
Start by pigmenting the outline in the heart of the lips. Pigment both lip arches first before connecting the outline up to the corners of the mouth.
2. Sew the lower lip:
Pigment the lower lip from one corner of the mouth to the other.
3. Intensity:
As the powder lips technique is intended to create a natural effect, the outline is pigmented in 1 - maximum 2 passes.
4. Uniform tension and pressure:
Always ensure even tension, movements and gentle pressure.
5. Alternate the halves:
Change the lip half after each pass.
The upper lip is pigmented first, followed by the lower lip
6. Breaks for monitoring:
If necessary, take short breaks to check the color absorption and pigmentation.

The shading:
1. Divide the lips into sections:
Divide the lips into individual sections of approx. 1-1.5 cm. You can do this visually or with line markings outside the lip shape.
2. Precise Pigmentation:
Concentrate on small areas when shading in order to work precisely and effectively.
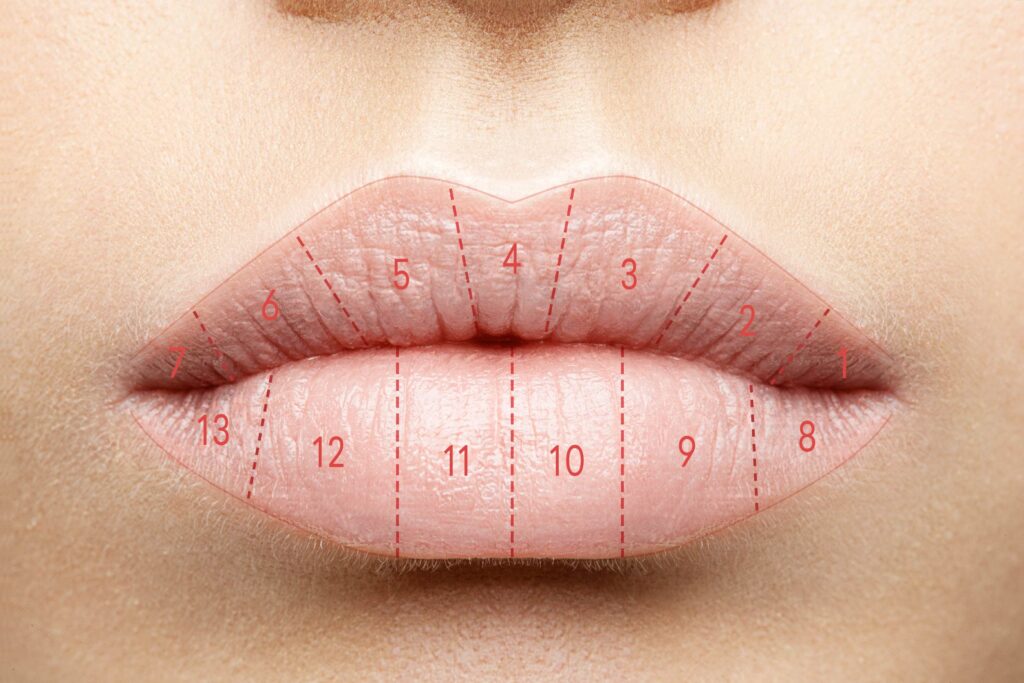

Shade step 1:
1. Technology courses:
Perform the first shading step using the fan technique with back-and-forth strokes, moving in one direction or both directions, depending on your preference.
2. Soft shading:
Make sure to place the lines close together to achieve a precise result
Especially on the inner part of the lips, the strokes should be applied with a gentle, springy motion to create an ombre effect.
3. Smooth movements and gentle pressure:
Always ensure that the tension is well applied, the movements are regular and the pressure is even and gentle.
4. Section by section:
Always start at the corner of the mouth and work your way section by section to the opposite corner of the mouth.
5. One round per section:
Perform shading step 1 with one pass per upper and lower lip. Depending on the skin texture, 2-4 times per section (1-1.5 cm).
Depending on the desired intensity, the shading step can be repeated using the fan technique
HIGHLIGHT EFFECT
Shade horizontally:
1. A second, lighter color is chosen as an accent
Perform the HIGHLIGHT shading step using the fan technique as well, with back-and-forth movements in one or both directions.
The "Highlight" technique is applied starting from the inner part of the lip and moving toward the center of the lip to achieve a soft effect.
The lines are kept farther apart to create a smooth transition between the two colors
2. Maintain tension and pressure:
Continue to pay attention to well-applied tension, regular movements and even, gentle pressure.
4. Upper lip first:
Pigment the upper lip first, section by section, before moving on to the lower lip.
5. Pay attention to individual sections:
Pigment 2-4 times per section. Cooling breaks can reduce irritation and increase color absorption.
6. Pigment Booster Cream:
Use the Pigment Booster Cream during breaks to soothe the skin and improve color absorption.