Lip Blush
Lip blush technique
The Blush Lips technique takes the nude effect to a new level. This method offers absolutely natural results and is very gentle and easy to perform. It is right on trend and creates a subtle but effective look that is perfect for clients who prefer a subtle and elegant style.
- Analysis of the form:
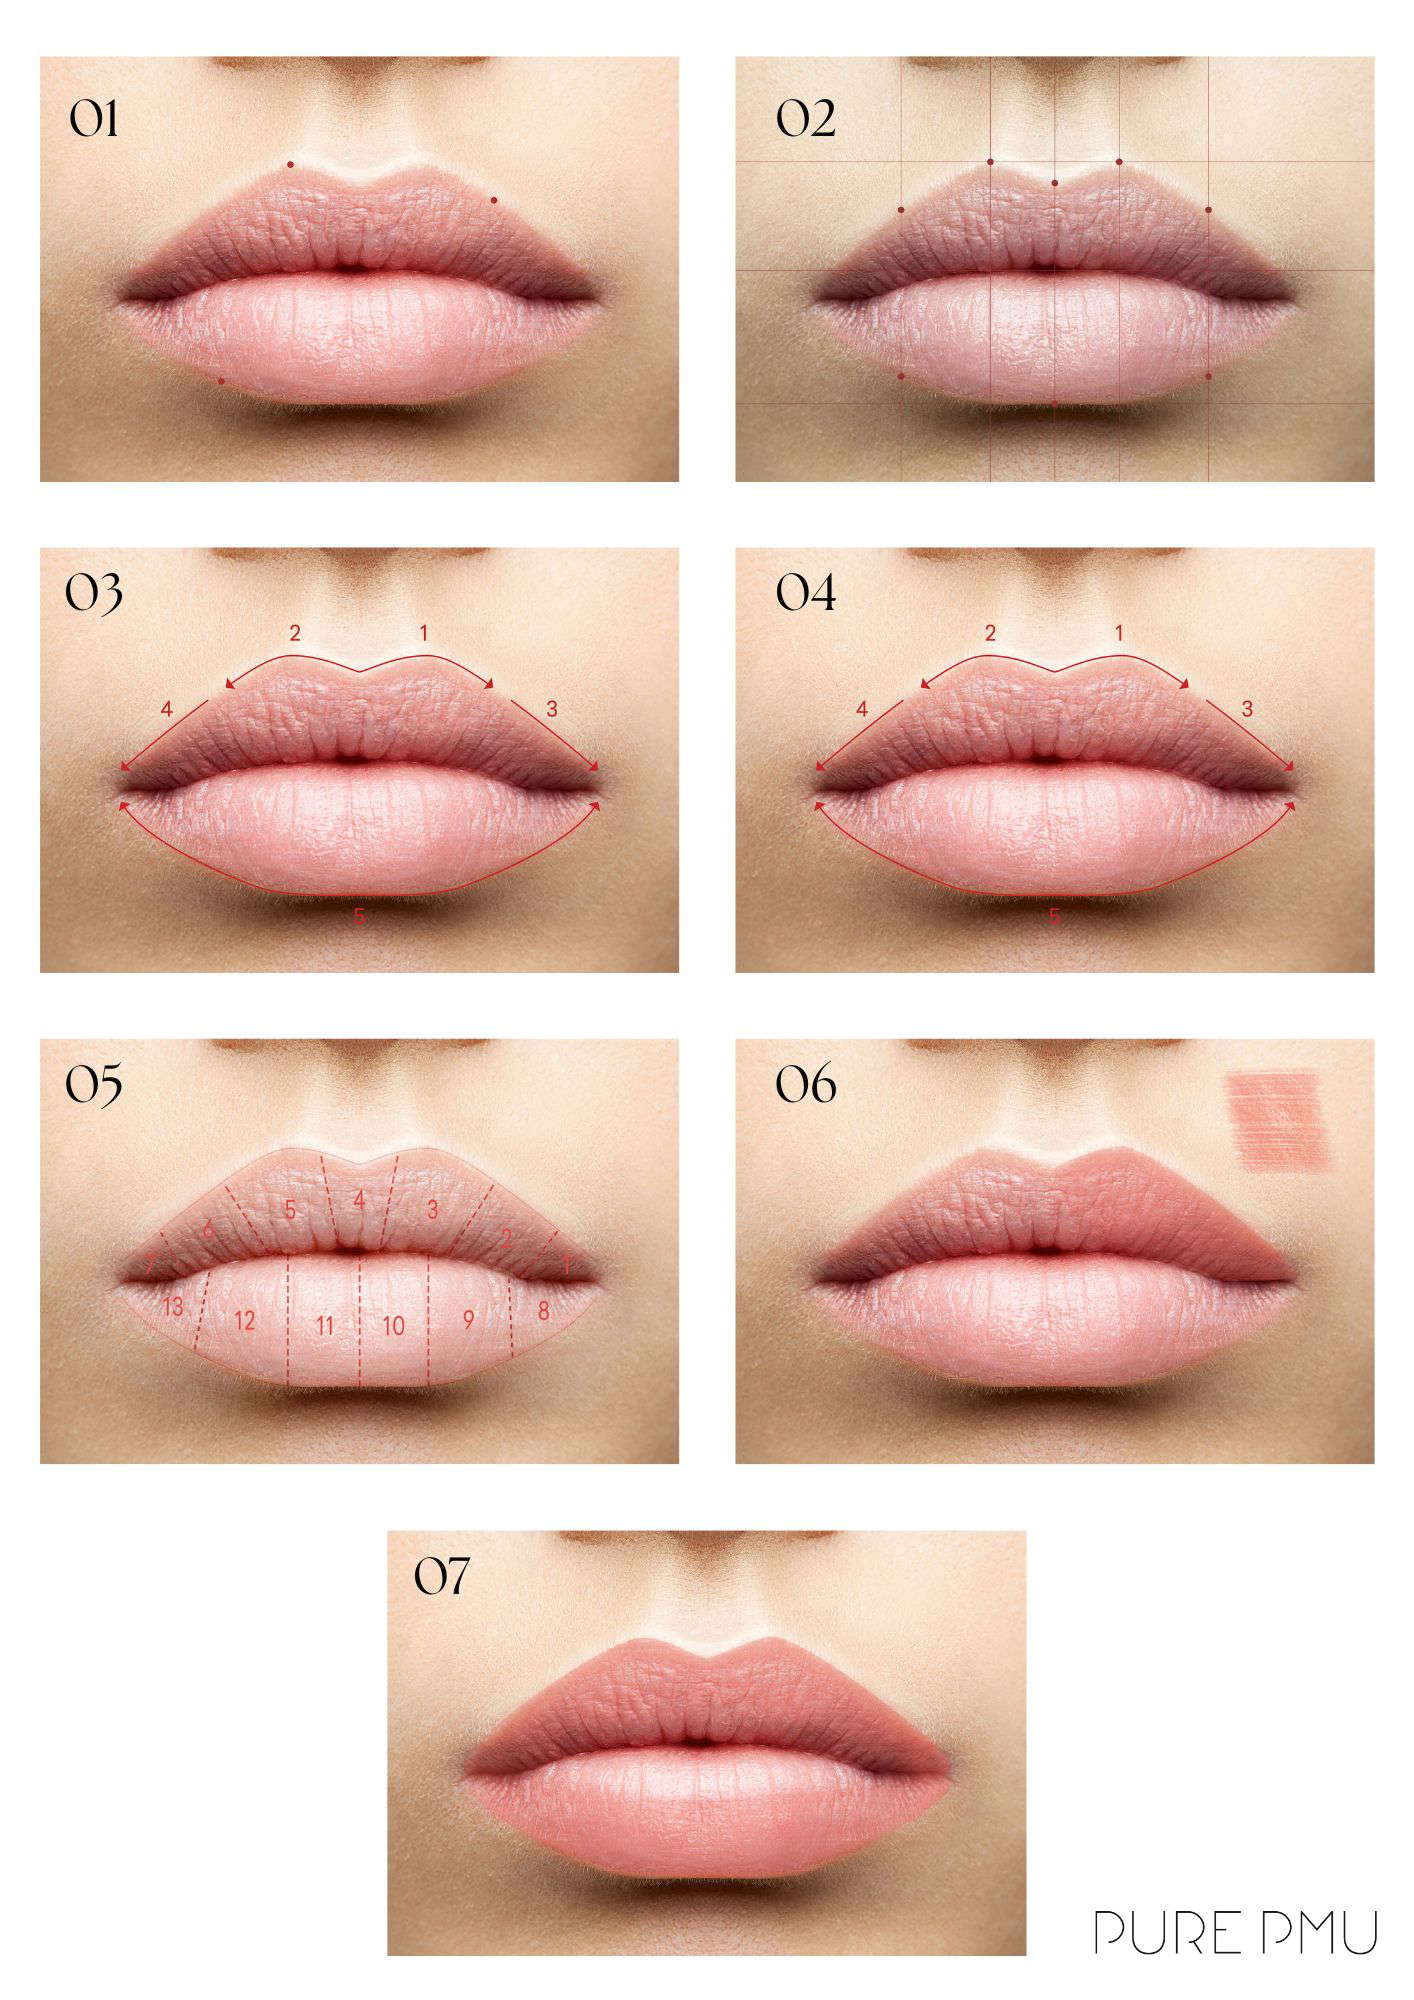
- First analyze the shape of the lips.
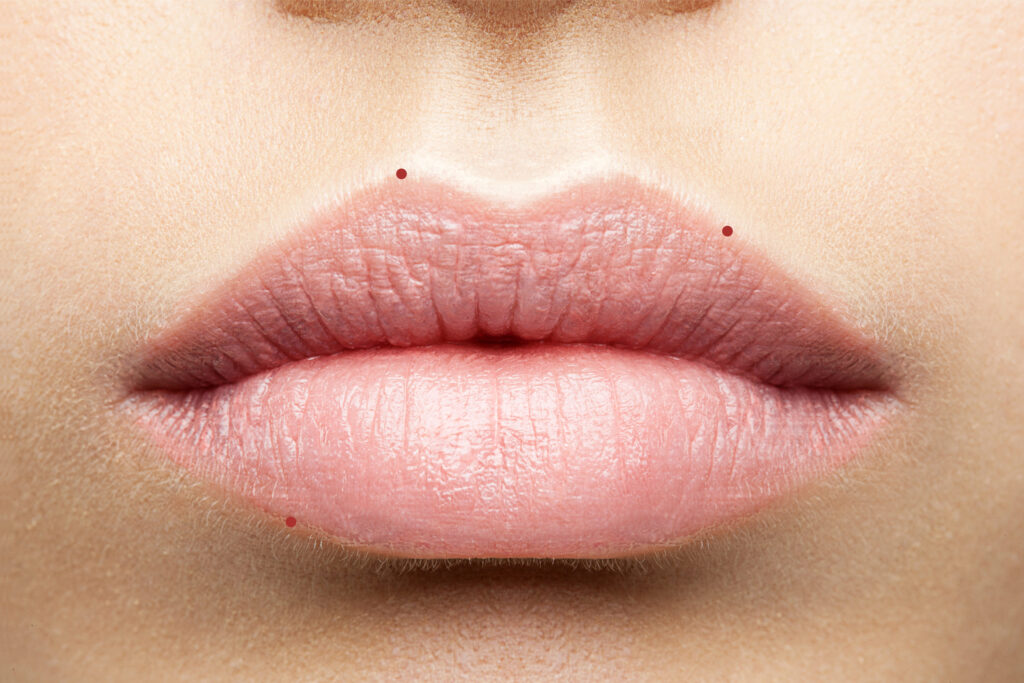
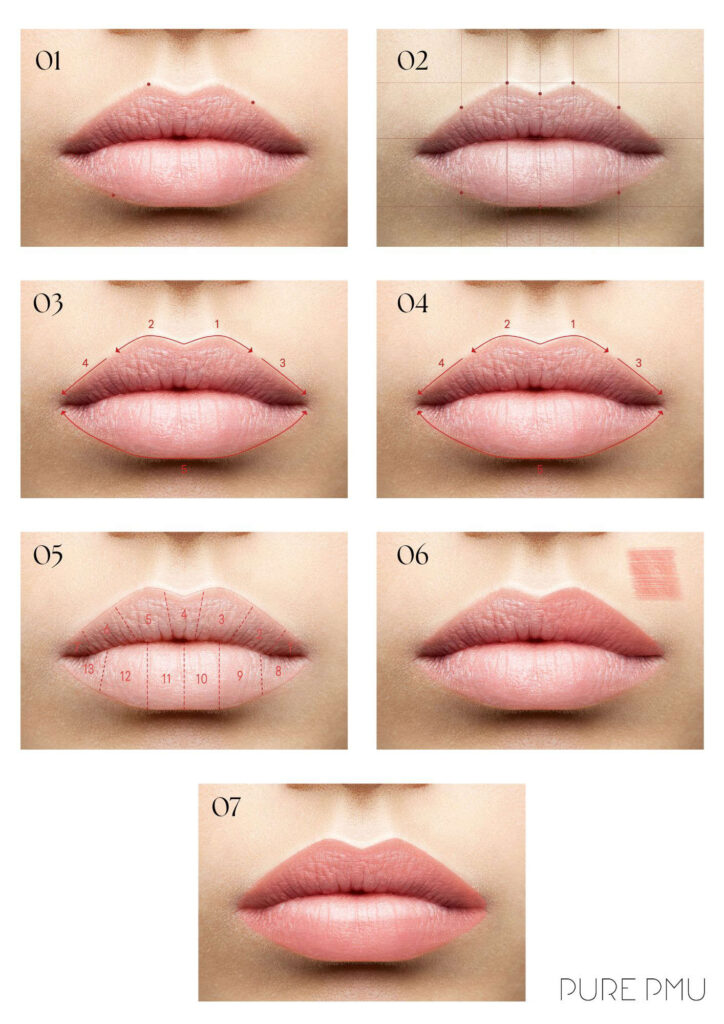
- Marking of asymmetrical areas:
- Mark asymmetrical areas of the lip shape with dots or strokes outside the lips to facilitate and even out the later sketching.
- Optimal customer position:
- It is best to mark the asymmetrical areas when your client is in a seated and relaxed position. Ask them to close their eyes to avoid facial expressions.

Further markings for preliminary drawing:
Make the preliminary drawing easier for yourself with additional markings outside the lip shape.

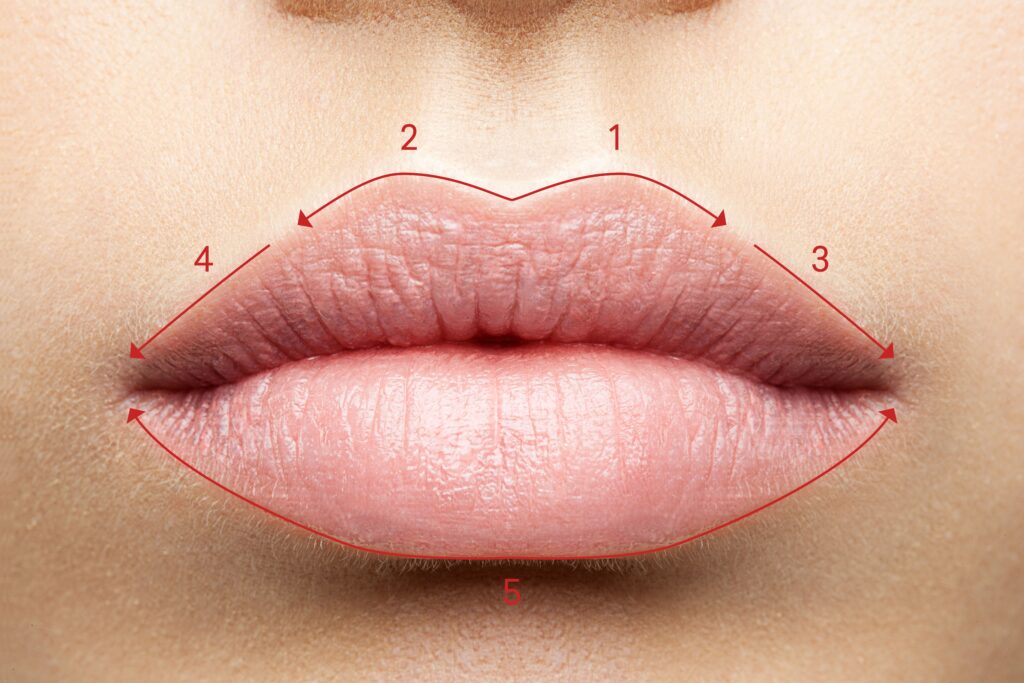
The preliminary drawing:
- Start in the lip heart:
- Start by drawing the outline in the heart of the lips. First draw both lip arches before connecting the outline up to the corners of the mouth.
- Observe the natural shape:
- Pay attention to a natural shape and avoid unnatural overdrawing. Stick to the natural lip line as far as possible.
- Connect the lower lip:
- Connect the outline of the lower lip from one corner of the mouth to the other.
- Precise lines:
- Draw precise lines with a well-sharpened pencil and smooth movements.
- Skin fixation:
- A slight fixation of the skin is sufficient to avoid mobility.
- Check symmetry:
- Check the symmetry of the preliminary drawing and correct if necessary.
- Upright position:
- Always check the symmetry with your client in an upright, relaxed position.
- Fill in the interior:
- Finally, fill in the inside of the lips to give your client an idea of the final result.

Pigmenting the outline:
- Start in the lip heart:
- Start by pigmenting the outline in the heart of the lips. Pigment both lip arches first before connecting the outline up to the corners of the mouth.
- Connect the lower lip:
- Pigment the lower lip from one corner of the mouth to the other.
- Intensity:
- As the lip blush technique is intended to create the most natural effect, the pigmentation of the outline is done in 1 pass.
- Even tension and pressure:
- Always ensure even tension, movements and gentle pressure.
- Alternate halves:
- Change the lip half after each pass.
- The upper lip is pigmented first, followed by the lower lip
- Control breaks:
- If necessary, take short breaks to check the color absorption and pigmentation.
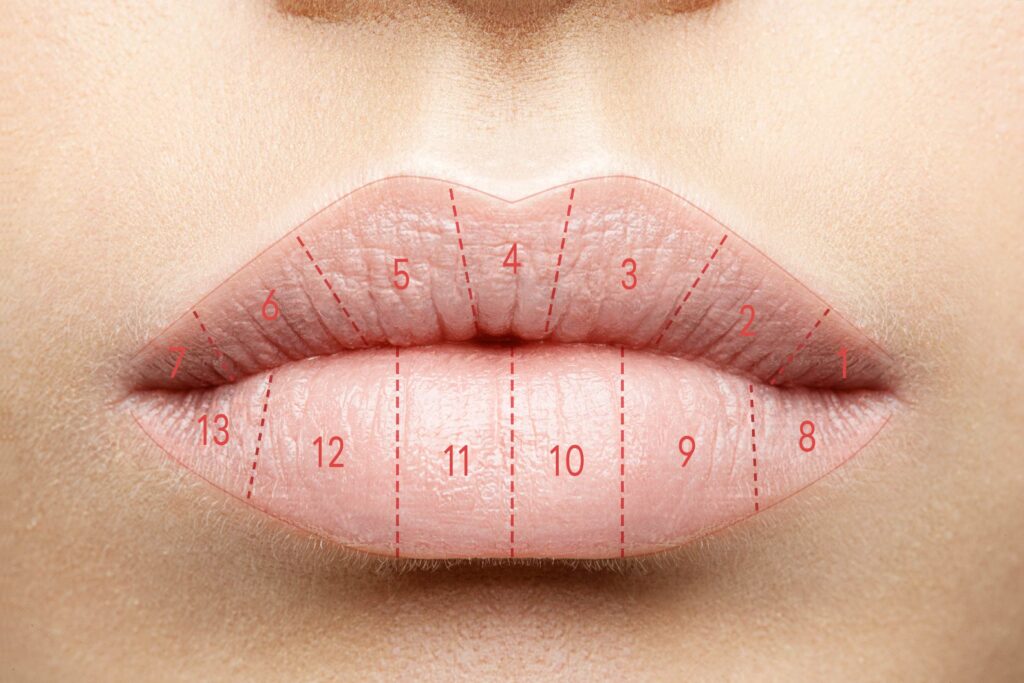
The shading:
- Divide the lips into sections:
- Divide the lips into individual sections of approx. 1-1.5 cm. You can do this visually or with line markings outside the lip shape.
- Precise pigmentation:
- Concentrate on small areas when shading in order to work precisely and effectively.
Shading step 1
Shade horizontally:
Perform the shading step horizontally with oscillating movements in one or both directions.
Maintain tension and pressure:
Continue to pay attention to well-applied tension, regular movements and even, gentle pressure.
Upper lip first:
Pigment the upper lip first, section by section, before moving on to the lower lip.
Pay attention to individual sections :
Pigment 2-4 times per section. Cooling breaks can reduce irritation and increase color absorption.
Pigment booster cream:
Use the Pigment Booster Cream during breaks to soothe the skin and improve color absorption.

Fine Tuning:
If necessary, individual areas of weak color can be pigmented again.
However, a complete additional pass should be avoided in order to maintain the blush effect
